

Introduction to DIY Home Decor Ideas:
DIY home decor ideas are budget-friendly, creative projects that allow you to customize, improve, and decorate your home living spaces using accessible tools and materials without hiring expensive professionals.
Transforming your house into a cozy, stylish home does not require spending thousands of dollars on high-end interior design and decor. If you are wondering how to decorate your home on a low budget, a little creativity and basic hand tools are all you need to easily craft custom pieces that reflect your personal style and elevate every room.
In this comprehensive guide, we are sharing 35 practical DIY home decoration ideas that anyone can build at home. To make your projects as smooth as possible, every single idea includes a complete list of required materials, necessary tools, estimated costs, and a clear step-by-step tutorial.
Whether you want to upgrade your living room, organize your kitchen, or find smart home decor ideas for small spaces, this guide gives you the exact blueprint to create beautiful decor tailored to your personal taste, space, and budget.
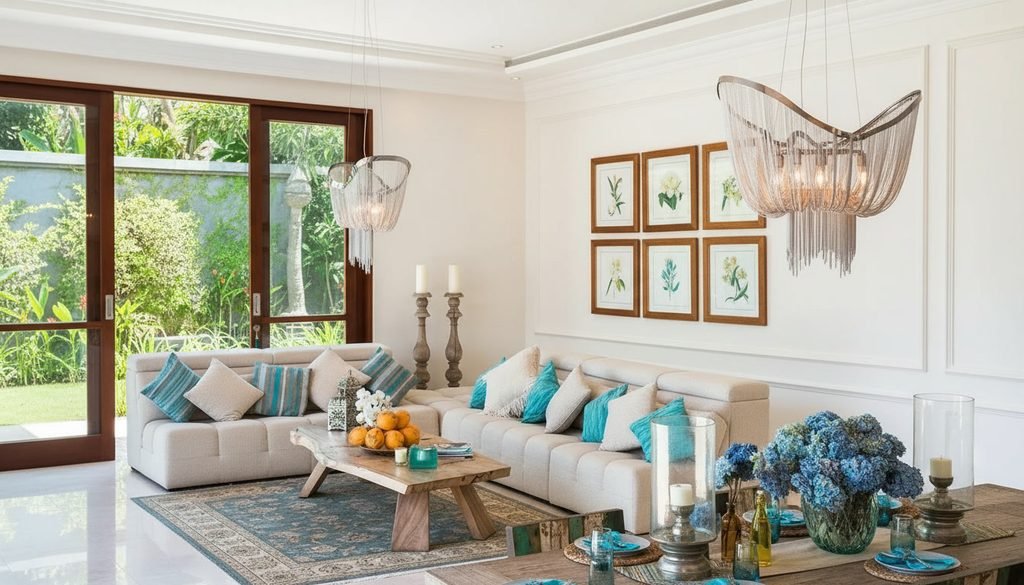
1. Painted Terracotta Flower Pots:
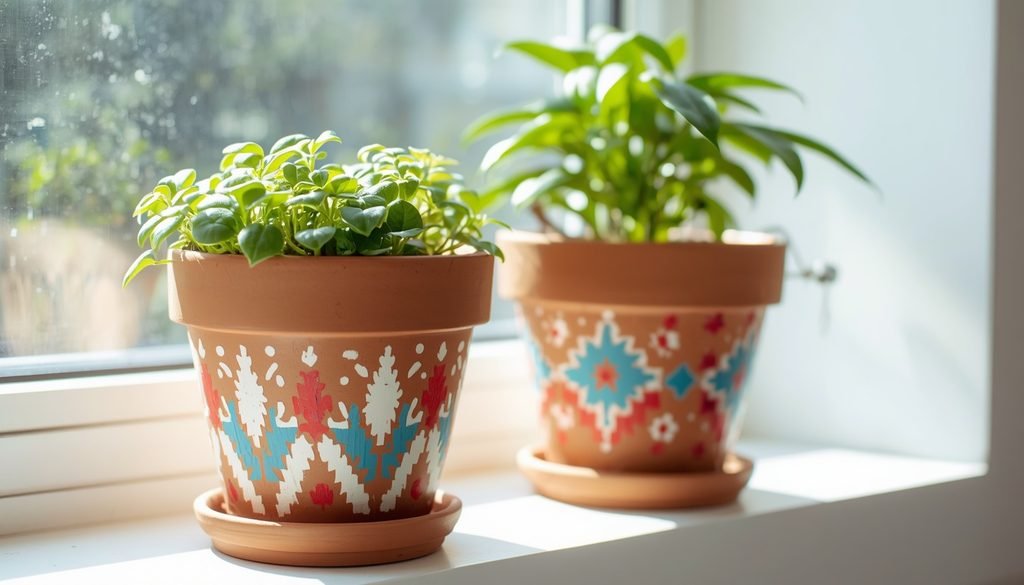
This project turns plain clay planters into colorful accent pieces using simple paint designs, making them ideal simple DIY home decor ideas for adding color to bright bedroom window sills, kitchen counters, or sunny patio tables using traditional terracotta clay bases.
Quick Stats:
- Estimated Cost: Under $15
- Time Required: Approximately 1 to 3 hours (including dry time)
Materials Needed:
- Plain terracotta pots and saucers
- Acrylic paints (white, blue, red)
- Clear waterproof spray sealer
- Small potted plants
Tools Required:
- Small paintbrushes
- Pencil
- Clean cloth
Step-by-Step DIY Method:
- Clean the Pot: Wipe the pot with a damp cloth to remove dirt and let it dry completely.
- Draw the Pattern: Lightly sketch your geometric design on the pot using a pencil.
- Paint the Design: Fill in the design with your acrylic paints and let it dry completely.
- Seal and Plant: Spray a light coat of clear waterproof sealer, add your plant, and place it on a windowsill.
Pro-Tip: Spray the inside of the pot with sealer before planting so water does not ruin the paint outside.
2. DIY Patterned Throw Pillow Covers:
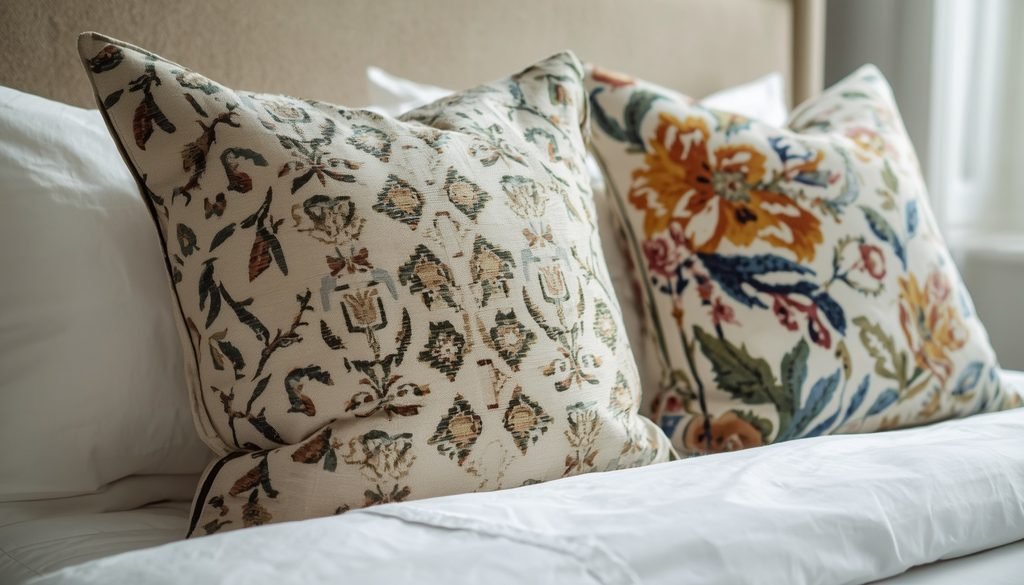
This project creates custom cushion slips to refresh your seating arrangements. If you are searching for cheap DIY home decor ideas, cushion slips give your old sofa or bed pillows a fresh, stylish look without spending money on brand-new furniture.
Quick Stats:
- Estimated Cost: Under $20
- Time Required: Approximately 1 to 2 hours
Materials Needed:
- Decorative fabric (cotton or canvas blend)
- Pillow insert
- Sewing thread (or fabric glue)
Tools Required:
- Scissors
- Sewing machine (or iron for heat-bond tape)
- Measuring tape
- Pins
Step-by-Step DIY Method:
- Cut the Fabric: Measure your pillow and cut two square pieces of fabric slightly larger than the pillow size.
- Pin Together: Flip both fabric pieces so the pattern sides face inward, and pin three sides together.
- Sew the Edges: Stitch along the three pinned sides, leaving one side completely open.
- Insert and Close: Turn the cover right-side out, put your pillow inside, and sew or glue the open side closed.
Pro-Tip: Buy a pillow insert that is 2 inches bigger than your cover to make your pillow look extra fluffy and high-end.
3. Upcycled Glass Bottle Candle Holders:
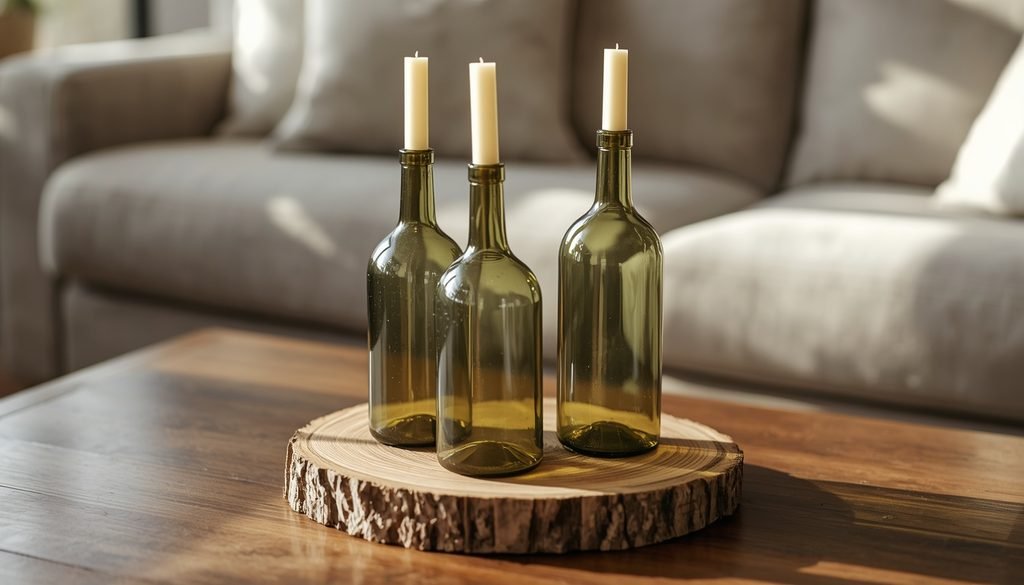
This glass bottle candle holder idea transforms empty wine or beverage bottles into rustic taper candle stands. Their main purpose is to create cozy accent lighting for dining tables, living room coffee tables, or mantelpieces using recycled glass.
Quick Stats:
- Estimated Cost: Under $10
- Time Required: Approximately 1 to 2 hours (including label soak time)
Materials Needed:
- Empty glass bottles (green or clear)
- Tall taper candles
- Warm water and dish soap
- Wooden display slice (optional)
Tools Required:
- Sponge or scrubber
- Utility knife (to trim candle bases if needed)
- Lighter or matches
Step-by-Step DIY Method:
- Remove Labels: Soak the glass bottles in warm, soapy water for 30 minutes to peel off the labels and clean off any excess glue.
- Dry Completely: Wash the inside and outside of the bottles, then dry them thoroughly with a towel.
- Fit the Candles: Insert a taper candle securely into the top neck of each bottle. If the candle is too thick, shave the bottom slightly with a knife.
- Arrange the Display: Place the bottles together on a natural wood slice or tray to complete your tabletop look.
Pro-Tip: Soften the bottom edge of each candle with a lighter flame for 2 seconds before inserting it into the bottle to lock it securely in place.
4. Reclaimed Wood Table Centerpiece Tray:
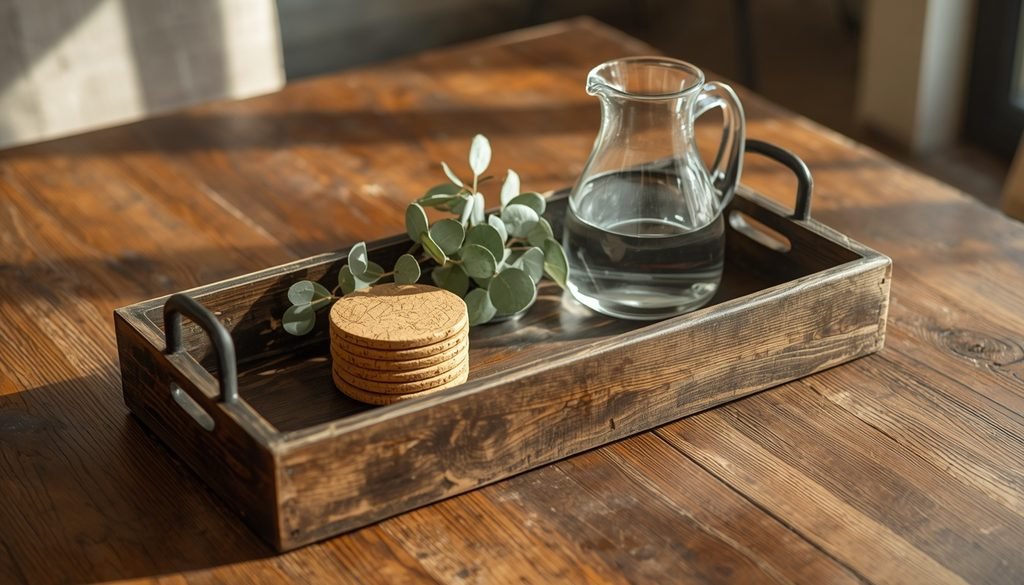
This wooden table tray project constructs a rustic serving base fitted with side handles to hold dining essentials. It stands out as one of the most practical easy home decor projects for beginners who want to build functional wooden trays for kitchen islands or coffee tables.
Quick Stats:
- Estimated Cost: Under $25
- Time Required: Approximately 1 to 3 hours
Materials Needed:
- Wood board base and side trim pieces
- Metal cabinet handles with screws
- Dark wood stain or protective wax finish
- Wood glue and finishing nails
Tools Required:
- Hand saw or miter saw
- Drill with driver bit
- Sandpaper (medium and fine grit)
- Hammer
Step-by-Step DIY Method:
- Cut and Sand: Measure and saw your wood board to size, then smooth all rough edges thoroughly with sandpaper.
- Assemble the Box: Glue and nail the four sides trim pieces around the base board to build the outer frame.
- Stain the Surface: Apply a coat of dark wood stain over the tray assembly and allow it to dry completely.
- Attach Metal Hardware: Drill small pilot holes on both ends and screw in your metal handles to complete the build.
Pro-Tip: Stick felt pads onto the four bottom corners of the tray to keep it from scratching your wooden table surface when moved.
5. Framed Rug Wall Hanging Art:
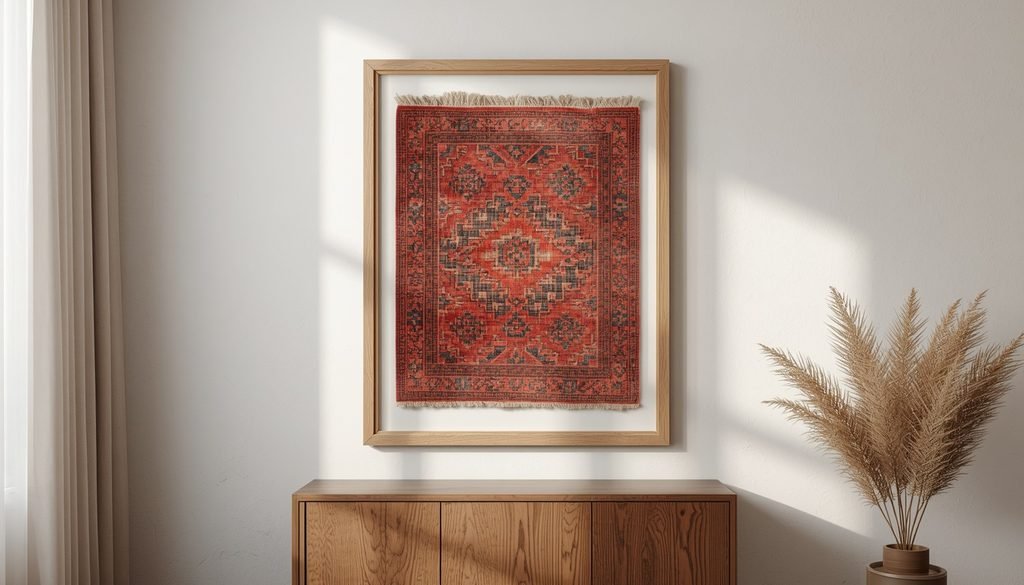
This project mounts vintage textile samples inside picture frames for stylish accents. It serves as one of our favorite DIY decoration ideas for wall spaces, showing you how to craft stunning framed rug wall art that creates a striking focal point for entryways or living rooms.
Quick Stats:
- Estimated Cost: Under $30
- Time Required: Approximately 1 to 2 hours
Materials Needed:
- Small patterned mini rug or woven runner sample
- Large wooden picture frame (shadowbox or deep frame)
- Heavy-duty backing board or mat board
- Mounting tape or strong textile adhesive
Tools Required:
- Scissors or utility knife
- Measuring tape
- Staple gun or mounting pins
- Picture hanging kit
Step-by-Step DIY Method:
- Prepare the Backing: Open the picture frame, remove the glass or front pane, and lay the backing board flat on a clean surface.
- Center the Rug: Position your woven rug sample squarely in the middle of the board, leaving an even border on all four edges.
- Mount the Fabric: Secure the rug onto the backing board using double-sided mounting tape, pins, or a few small staples around the top edge.
- Frame and Hang: Reassemble the frame structure carefully, secure the back tabs, and mount your new textile artwork onto the wall.
Pro-Tip: Remove the front glass entirely to let the natural woven texture, fringed edges, and depth of the rug stand out against your wall.
6. Rope Wrapped Cylinder Table Lamp:
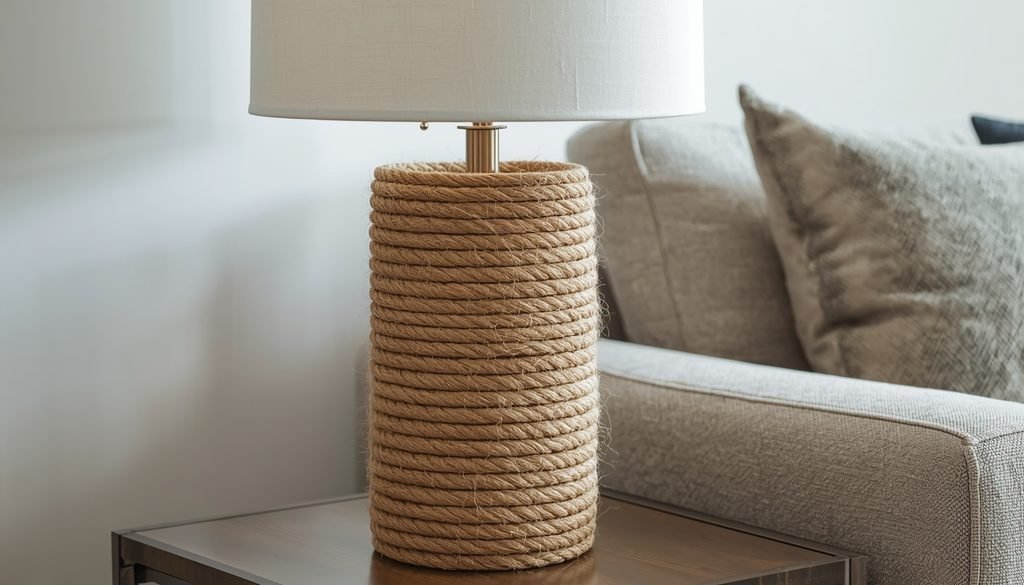
This project gives an old or plain cylindrical lamp base an organic, coastal texture. Wrapping natural jute twine around a smooth base proves that crafting high-end DIY decor on a budget is entirely achievable with basic household supplies.
Quick Stats:
- Estimated Cost: Under $20
- Time Required: Approximately 1 to 2 hours
Materials Needed:
- Plain cylindrical table lamp base
- Thick natural jute or hemp rope
- Hot glue sticks
- Fabric lampshade
Tools Required:
- Hot glue gun
- Scissors or utility knife
- Measuring tape
Step-by-Step DIY Method:
- Clean the Base: Wipe down the lamp base to ensure it is free of dust and oil so the adhesive sticks properly.
- Start at the Bottom: Apply a line of hot glue around the bottom rim of the lamp base and press the end of the rope firmly in place.
- Wrap Tightly: Continue applying glue in small sections as you wrap the rope upwards, keeping each row tight and flush against the previous one.
- Secure the Top: Once you reach the top edge near the socket, trim the excess rope at an angle, glue the end down smoothly, and attach your lampshade.
Pro-Tip: Angle-cut the end of the rope before gluing it at the top so it blends seamlessly into the final wrap ring.
7. DIY Fluted Arch Table Lamp:
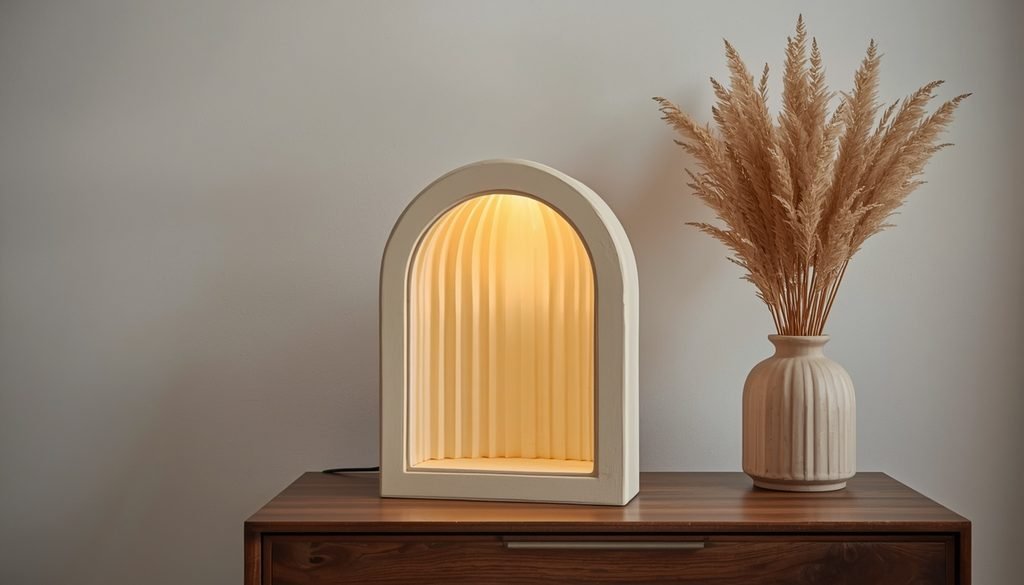
This fluted arch table lamp project builds a modern sculptured light niche using structural fluting details to bring soft ambient illumination to credenzas or nightstands. It is a fantastic option for modern aesthetic diy room decor, combining architectural arch silhouettes with warm backlighting.
Quick Stats:
- Estimated Cost: Under $30
- Time Required: Approximately 2 to 3 hours
Materials Needed:
- Arch-shaped wooden or foam frame structure
- Half-round wooden dowels or flexible fluted paneling
- Warm LED puck light or small lamp kit
- Off-white plaster-finish or textured matte paint
Tools Required:
- Strong craft adhesive or wood glue
- Utility knife or hand saw
- Paintbrush or foam roller
- Fine sandpaper
Step-by-Step DIY Method:
- Build the Arch Shell: Construct or prepare your arched outer casing, ensuring the central back niche remains open for mounting the light.
- Apply Fluted Strips: Cut your fluted strips to match the interior arch curve and glue them tightly along the back wall to create vertical ridges.
- Paint the Structure: Coat the entire assembly inside and out with matte off-white textured paint, letting it dry completely.
- Install the Light: Mount a small LED puck light behind the lower inner lip to cast a warm upward glow across the fluted backdrop.
Pro-Tip: Mix a tablespoon of baking soda into your acrylic paint to create a realistic stone-like ceramic texture across the outer frame.
8. Floating Wooden Wall Display Shelves:
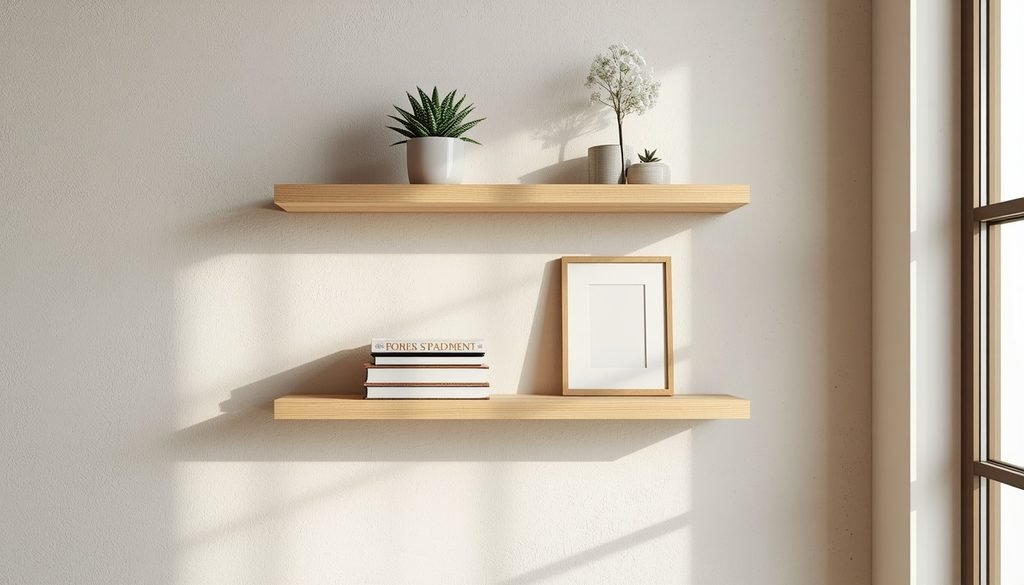
This floating wooden shelf project uses clean pine planks to hold small plants, books, and photo frames on your walls. It offers functional DIY home decor ideas on a budget to give you extra storage and display space without taking up any floor area.
Quick Stats:
- Estimated Cost: Under $20
- Time Required: Approximately 1 to 2 hours
Materials Needed:
- Smooth wooden boards
- Concealed wall brackets or screws
- Wall anchors
- Clear wood varnish or wax
Tools Required:
- Power drill
- Spirit level
- Measuring tape
- Pencil
Step-by-Step DIY Method:
- Mark the Wall: Hold your spirit level against the wall, draw a straight line with a pencil, and mark where the wall brackets will go.
- Drill and Mount: Drill holes into the marked spots, insert wall anchors, and screw the wall brackets tightly into place.
- Sand the Wood: Smooth out the surfaces and corners of your wooden boards using sandpaper.
- Slide and Secure: Slide the wooden boards directly onto the wall brackets and check that they are completely level.
Pro-Tip: Always anchor your shelf brackets directly into wall studs so they can safely hold heavy items like thick books and ceramic pots.
9. Handmade Concrete Ceramic Bookends:
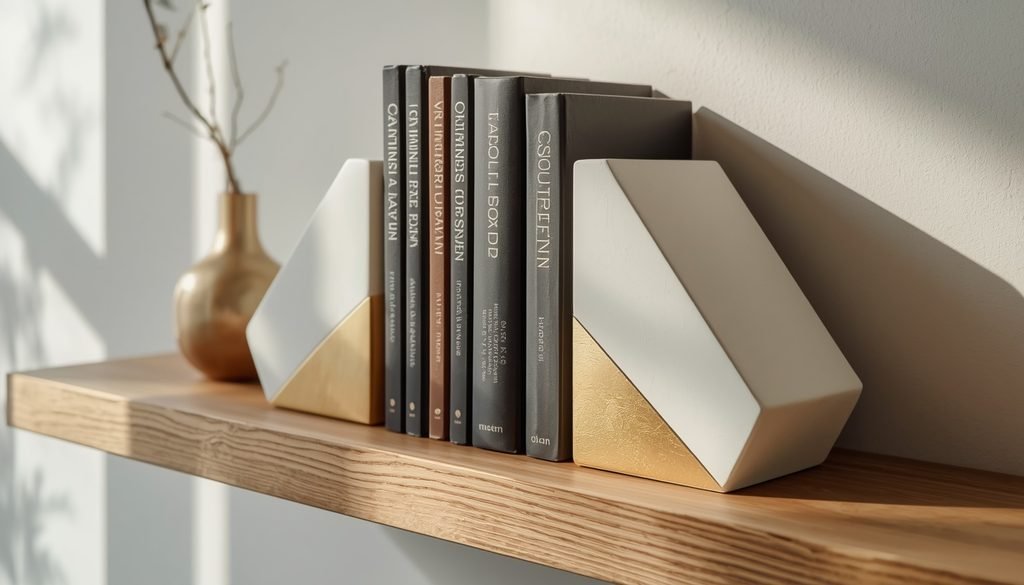
This concrete bookends project uses simple molds to cast heavy geometric blocks that hold your books upright. Its main purpose is to keep your desk or bookshelves organized while adding a modern accent to your room for just a few dollars.
Quick Stats:
- Estimated Cost: Under $15
- Time Required: Approximately 1 hour (plus 24 hours to dry)
Materials Needed:
- Fast-setting concrete mix
- Water
- Milk cartons or plastic molds
- Off-white and metallic gold paint
- Painter’s tape
Tools Required:
- Mixing bucket
- Stirring stick
- Sandpaper
- Paintbrush
Step-by-Step DIY Method:
- Mix the Concrete: Combine the concrete mix with water in a bucket until it reaches a smooth, pourable texture.
- Pour into Molds: Fill your plastic or cardboard molds evenly and tap the sides gently to remove air bubbles.
- Unmold and Sand: Let the concrete harden for 24 hours, peel off the molds, and sand down any rough edges.
- Paint the Accent: Use painter’s tape to block off a diagonal line, paint the top white and the bottom gold, and then let it dry.
Pro-Tip: Glue pieces of felt or rubber pads on the bottom of each bookend so they will not scratch your wooden shelves.
10. Hand-Painted Coir Welcome Mat:
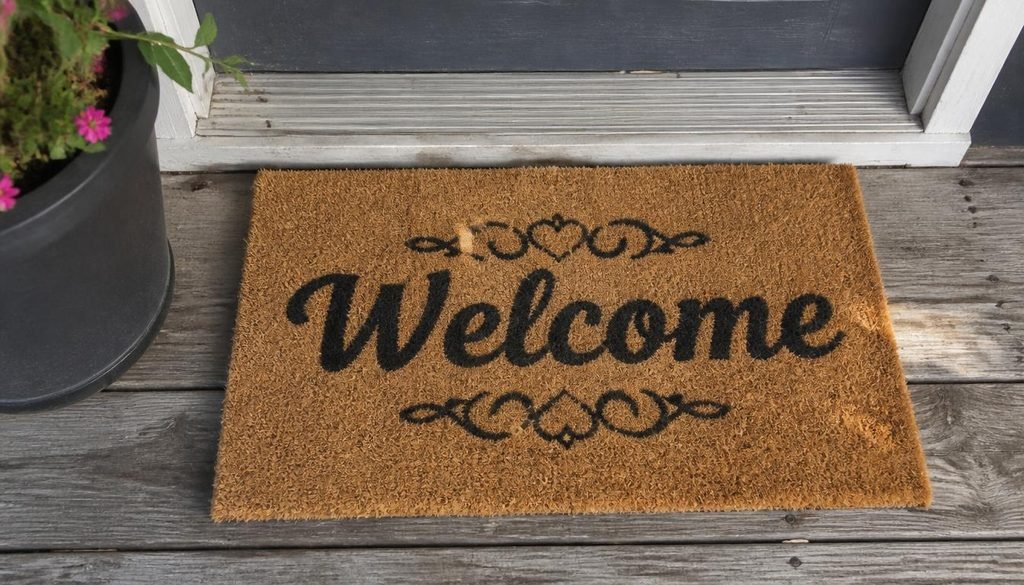
This painted coir mat project lets you add custom lettering and decorative borders onto a plain doormat using weather-resilient acrylic paint. Its main purpose is to give your front door entrance an inviting look while keeping dirt outside, making it a fun, quick project that upgrades your home’s curb appeal.
Quick Stats:
- Estimated Cost: Under $15
- Time Required: Approximately 1 to 2 hours (plus drying time)
Materials Needed:
- Plain coir doormat
- Exterior black acrylic paint or outdoor rubber paint
- Clear weather-proof spray sealer
- Vinyl lettering stencil or paper template
Tools Required:
- Stiff bristle paint sponge or stencil brush
- Painter’s tape
- Scissors
Step-by-Step DIY Method:
- Tape the Stencil: Place your custom stencil or printed text template on the center of the mat and secure it firmly with painter’s tape.
- Dab the Paint: Press black exterior paint into the coir fibers using a dabbing motion with your brush to get clear, sharp lines.
- Remove Template: Carefully lift off the stencil while the paint is still slightly damp so the edges do not pull up.
- Seal for Outdoors: Let the paint dry completely, then spray a light coat of clear waterproof sealer over the entire design.
Pro-Tip: Use a dabbing or stippling motion instead of brushing sideways to force the paint deep into the coarse fibers of the mat.
11. Custom Framed Gallery Photo Wall:
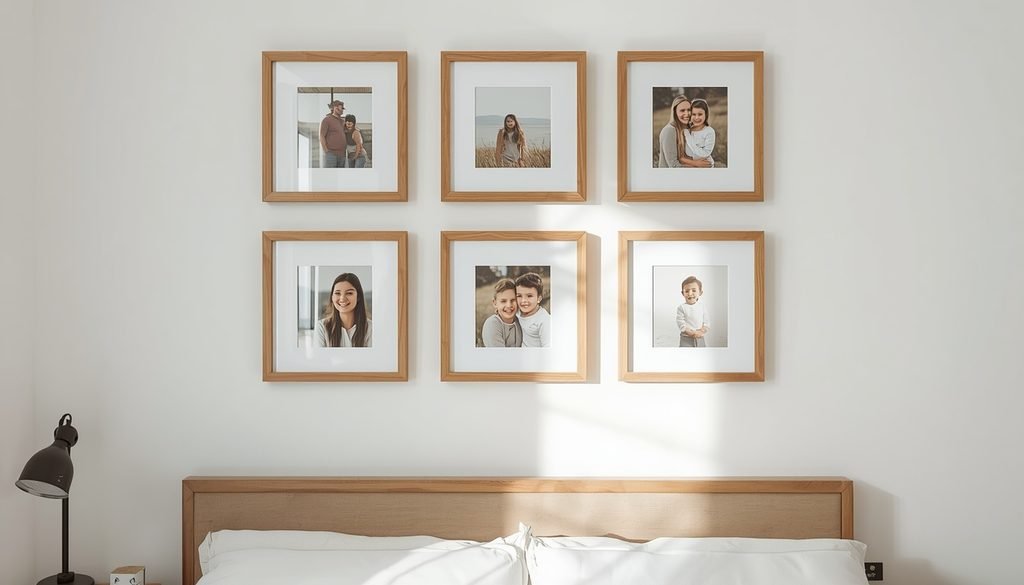
This framed photo wall project combines matching wood frames into a grid layout to turn empty walls into a personal memory display. If you are exploring fresh wall decor ideas for living rooms or staircases, grid gallery walls keep the space organized and visually striking.
Quick Stats:
- Estimated Cost: Under $35
- Time Required: 1 to 2 hours
Materials Needed:
- 6 matching wooden picture frames
- Photo prints with white mat boards
- Kraft paper sheets
- Painter’s tape
Tools Required:
- Measuring tape
- Bubble level
- Hammer and hanging nails
- Pencil
Step-by-Step DIY Method:
- Map the Layout: Cut paper sheets to match frame dimensions and tape them to the wall to test your arrangement.
- Space the Grid: Measure exactly 2 inches between every paper cutout, making sure the top and bottom rows align straight with a level.
- Set the Hooks: Drive nails directly through the top center marks of your paper guides, then pull the paper away.
- Mount the Frames: Place your framed prints onto the nails and double-check each one with your level.
Pro-Tip: Put a small piece of painter’s tape over the wall spot before hammering to prevent drywall chips or cracking.
12. Upcycled Tin Can Desk Organizer:
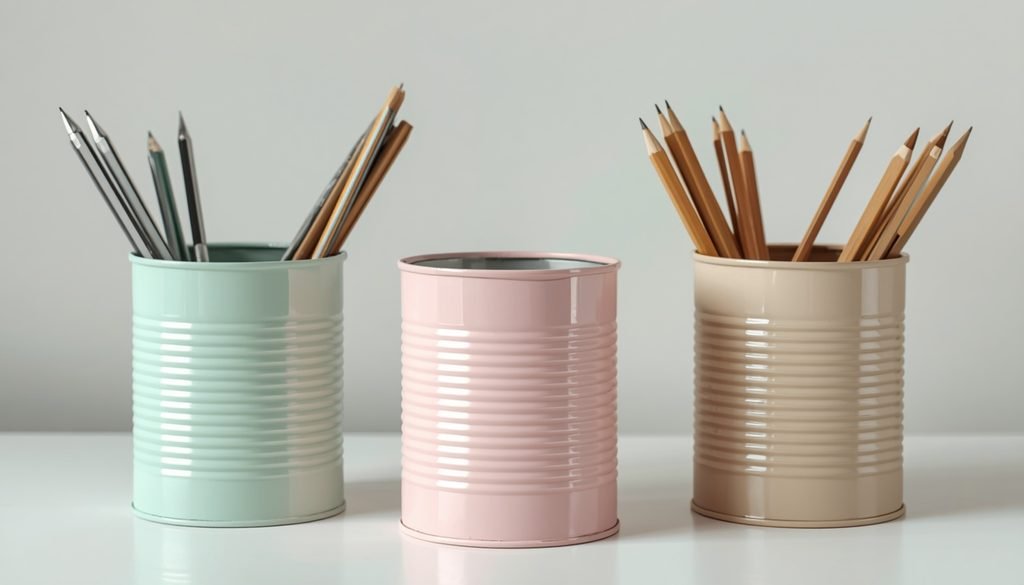
This tin can desk organizer project recycles empty metal cans into colorful pencil holders to clean up cluttered work tables. It keeps daily stationery sorted into clear groups so your workspace stays tidy and functional.
Quick Stats:
- Estimated Cost: Under $10
- Time Required: 1 hour
Materials Needed:
- 3 empty metal tin cans
- Pastel acrylic paints (mint, pink, beige)
- Metal primer spray
- Clear sealant spray
Tools Required:
- Medium paintbrushes
- Sandpaper or file
- Clean rag
Step-by-Step DIY Method:
- Prep the Cans: Wash the empty cans thoroughly, peel off all paper labels, and file down any sharp inner edges.
- Apply Base Coat: Spray a light layer of metal primer over the outside surfaces to help the colored paint stick.
- Paint Colors: Coat each tin can with a different pastel acrylic paint color and allow them to dry completely.
- Protect the Finish: Spray a quick layer of clear sealant over the cans to prevent paint scratches during everyday use.
Pro-Tip: Wrap a piece of masking tape around the inner top rim before painting so the metal edges look smooth and sharp.
13. DIY Concrete Desktop Flower Planter:
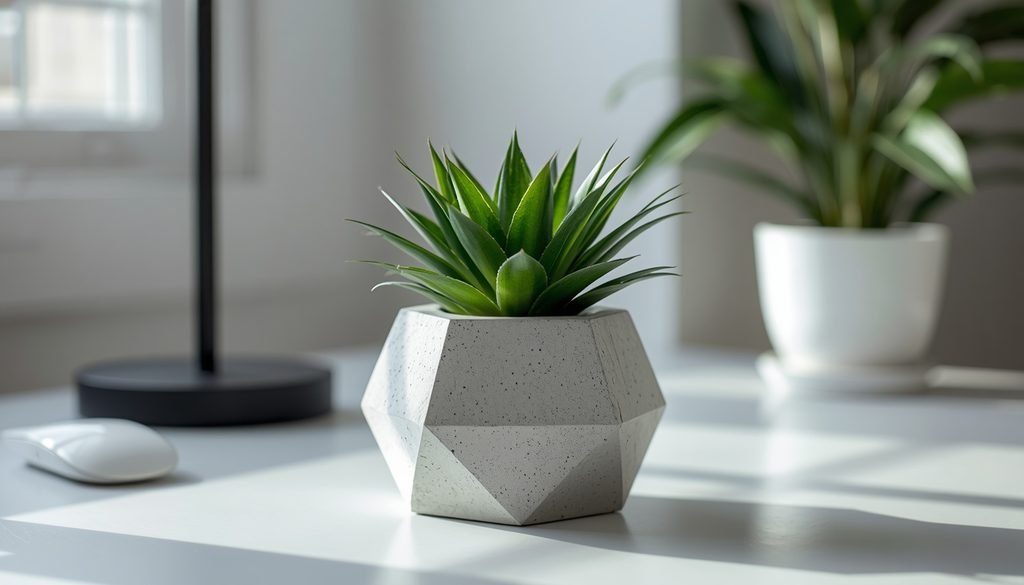
This concrete desktop planter project casts a small geometric container to hold hardy succulent plants on your work table. It stands out as an ideal home decor idea for small spaces, adding a touch of green life and modern texture directly to your desk space without taking up too much room.
Quick Stats:
- Estimated Cost: Under $12
- Time Required: 45 minutes (plus 24 hours to dry)
Materials Needed:
- Fine craft concrete mix
- Water
- Geometric silicone mold
- Small succulent plant with soil
Tools Required:
- Plastic mixing bowl
- Stirring spatula
- Fine sandpaper
- Cooking oil spray (for easy release)
Step-by-Step DIY Method:
- Prepare the Mold: Lightly coat the inside of your silicone geometric mold with cooking oil spray so the pot releases easily.
- Mix and Pour: Blend concrete powder with water into a smooth paste, then pour it straight into your mold.
- Tap and Dry: Tap the sides of the mold on your desk to release trapped air bubbles, then let it set for a full day.
- Unmold and Plant: Pop the hardened concrete pot out, smooth the base with sandpaper, and insert your small succulent.
Pro-Tip: Coat the inside bottom of the planter with a clear waterproof sealer before adding soil to protect your desk surface from moisture.
14. Custom Fabric Covered Jewelry Organizer:

This fabric-covered jewelry organizer fits soft padded divider inserts inside a drawer to keep daily accessories sorted. It serves as one of those essential simple DIY home decor projects that bring immediate order to messy vanity drawers or nightstands.
Quick Stats:
- Estimated Cost: Under $18
- Time Required: 1 to 2 hours
Materials Needed:
- Thin wooden or cardboard divider strips
- Soft beige velvet or linen fabric
- Thin foam padding sheet
- Spray adhesive or fabric glue
Tools Required:
- Scissors or utility knife
- Ruler or measuring tape
- Hot glue gun
- Pencil
Step-by-Step DIY Method:
- Measure the Drawer: Take exact interior dimensions of your dresser drawer and cut thin divider strips to form a grid template.
- Wrap in Foam: Glue a thin layer of foam padding onto each strip section to create soft cushion edges.
- Cover with Fabric: Wrap soft velvet or linen fabric smoothly around the padded strips, securing the back edges with hot glue.
- Assemble and Fill: Interlock the fabric-wrapped dividers inside the drawer floor and arrange your rings, earrings, and necklaces inside.
Pro-Tip: Roll small scraps of fabric over foam cylinders to make soft ring slots that hold bands snugly in place.
15. Wall-Mounted Mirror & Floating Shelf:
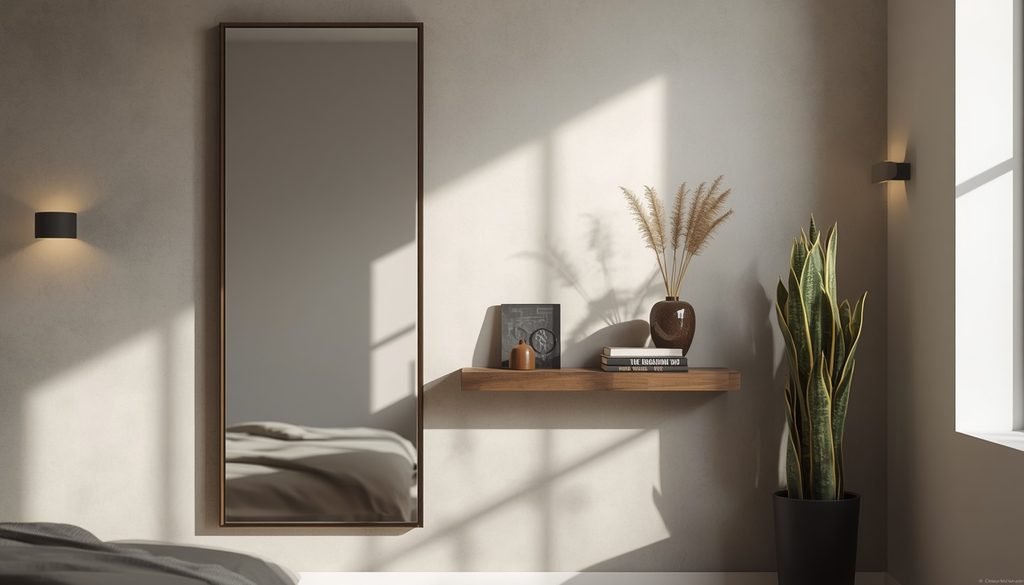
This wall-mounted mirror and floating shelf setup couples a full-length wooden frame with a ledge to make entryways or bedrooms feel bigger. It is a fantastic choice when exploring DIY home decor ideas to expand visual space while adding daily functionality.
Quick Stats:
- Estimated Cost: Under $40
- Time Required: 1 to 2 hours
Materials Needed:
- Tall rectangular mirror with wood trim
- Solid wood plank for floating shelf
- Heavy-duty wall brackets
- Heavy-duty wall anchors and screws
Tools Required:
- Power drill
- Bubble level
- Measuring tape
- Pencil
Step-by-Step DIY Method:
- Hang the Mirror: Position your full-length mirror vertically on the wall, mark the top bracket points, and secure it with heavy-duty anchors.
- Mark the Shelf: Align your wood shelf right beside the mirror at waist height, using a bubble level to mark a straight line.
- Mount the Support: Drill holes along the marked line and attach your hidden shelf brackets securely to the wall.
- Attach and Style: Slide the wood plank onto the wall brackets and place a small vase or books on top to complete the setup.
Pro-Tip: Position this setup directly opposite a light source or window to bounce natural sunlight across the room.
16. Macramé Cord Hanging Plant Holder:
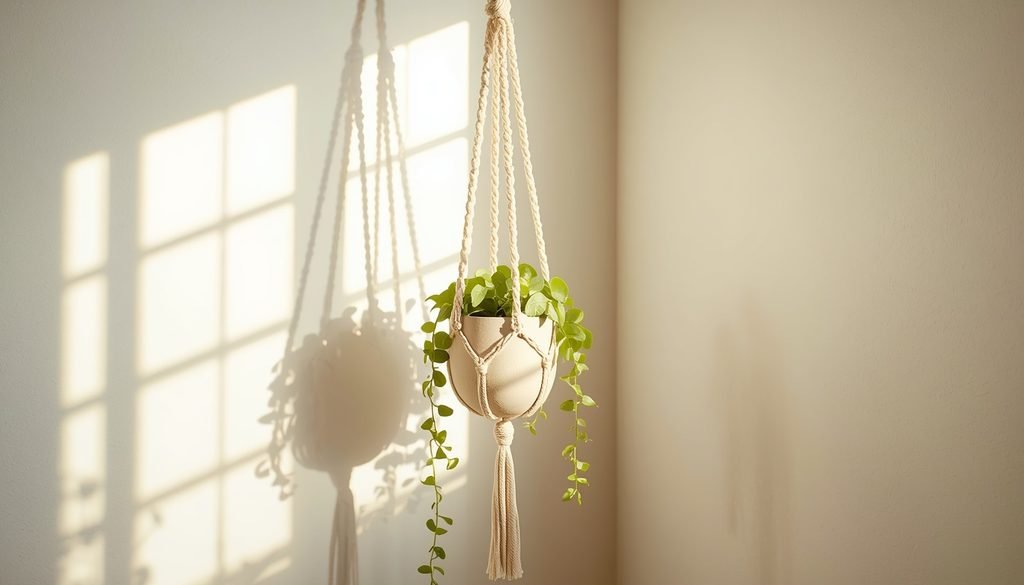
This macramé hanging plant holder weaves cotton cord into a strong net to suspend potted greenery near sunny windows. If you love bohemian accents, incorporating custom macrame decor allows you to utilize vertical ceiling areas without crowding your floor space.
Quick Stats:
- Estimated Cost: Under $12
- Time Required: 45 minutes to 1 hour
Materials Needed:
- 4mm natural cotton macrame cord
- Metal or wooden ring
- Small ceramic plant pot
- Ceiling hook kit
Tools Required:
- Scissors
- Measuring tape
Step-by-Step DIY Method:
- Attach Cords: Cut four long lengths of cotton cord, fold them in half, and loop the centers tightly around the mounting ring.
- Knot the Strands: Divide the hanging cords into four separate pairs and tie basic spiral or square knots down each strand.
- Form the Basket: Tie neighboring cords together a few inches lower down to create a criss-cross net mesh that cradles the pot.
- Finish and Hang: Gather all cords at the bottom, tie a secure gathering knot below the pot base, and hang the ring onto a ceiling hook.
Pro-Tip: Place your ceramic pot inside the cord structure before tying the final bottom knot so the mesh wraps snugly around its exact shape.
17. Hanging Rope Wood Corner Shelf:
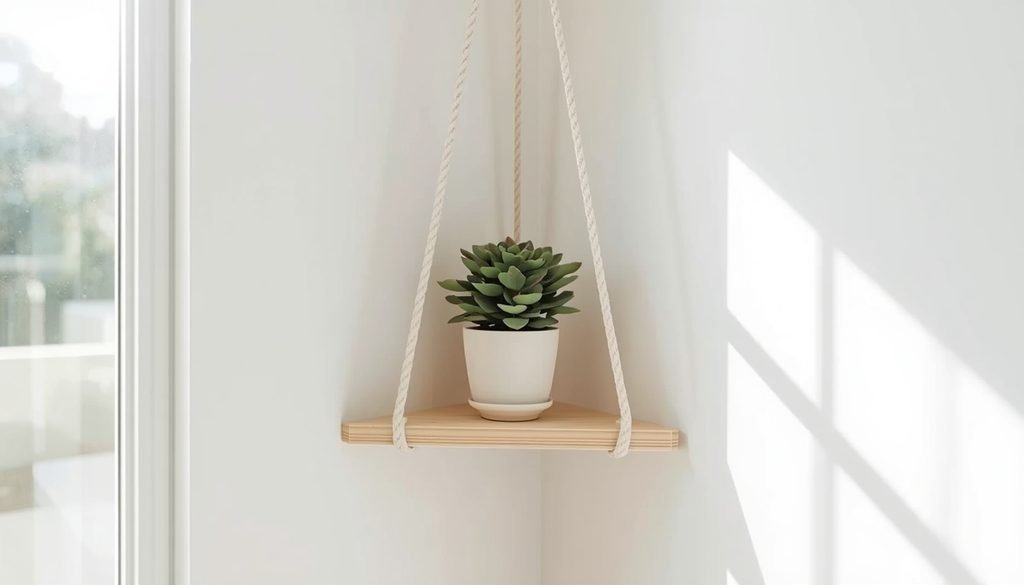
This hanging rope wood corner shelf suspends a triangular wooden plank using sturdy cord to fill empty room corners. It provides lightweight DIY home decoration ideas for turning unused wall nooks into functional storage spots.
Quick Stats:
- Estimated Cost: Under $15
- Time Required: 1 hour
Materials Needed:
- Triangular wooden board
- Thick cotton rope or jute cord
- Metal ceiling screw hook
- Clear wood finish or varnish
Tools Required:
- Power drill with a wide drill bit
- Fine sandpaper
- Scissors
- Bubble level
Step-by-Step DIY Method:
- Prep the Board: Drill three holes near the corners of your triangular board, then smooth all surfaces with sandpaper.
- Thread the Rope: Cut three equal lengths of rope, knot them together at the top loop, and thread the free ends down through the board holes.
- Level and Knot: Tie secure knots underneath each corner of the board, using a bubble level to ensure the wood stays flat.
- Mount the Shelf: Screw your metal hook firmly into the ceiling corner and hang the top rope loop directly onto it.
Pro-Tip: Wrap a small piece of masking tape around the rope ends before threading to keep the fibers from fraying as they pass through the drill holes.
18. Handcrafted Woven Cane Tissue Box Cover:
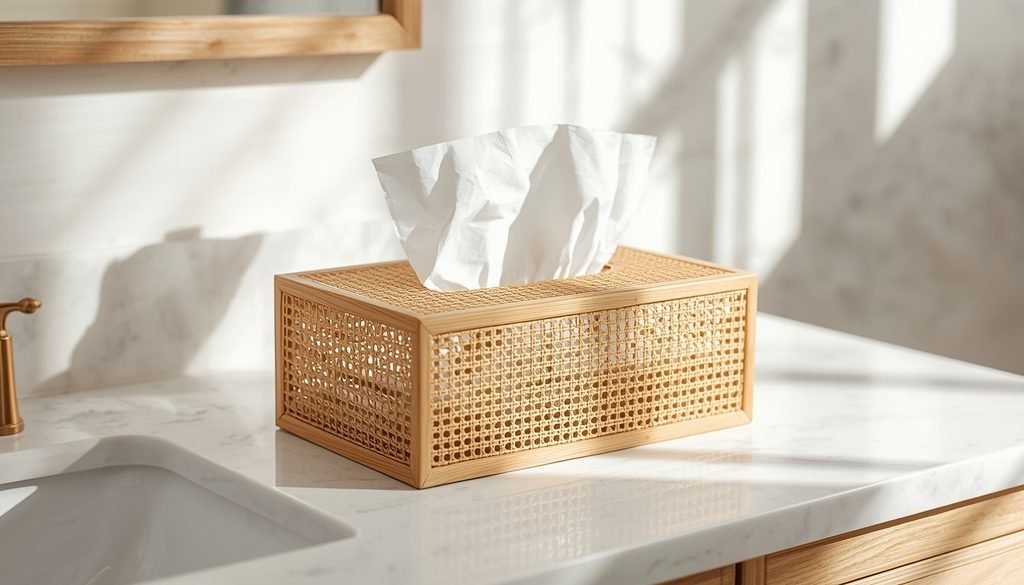
This handcrafted woven cane tissue box cover hides plain cardboard tissue boxes inside a warm, natural rattan wooden frame. It is an ideal pick when building DIY home decor ideas that make everyday bathroom accessories look upscale.
Quick Stats:
- Estimated Cost: Under $20
- Time Required: 1 to 2 hours
Materials Needed:
- Woven cane webbing sheet
- Thin wooden craft trim strips
- Wood glue
- Standard cardboard tissue box (for sizing)
Tools Required:
- Heavy-duty scissors or utility knife
- Hot glue gun
- Sandpaper
- Small clamps or painter’s tape
Step-by-Step DIY Method:
- Soak the Cane: Dip your woven cane webbing in warm water for 15 minutes to make it soft and easy to bend.
- Build the Frame: Glue thin wood trim pieces into a hollow rectangular box structure, cutting a slot in the top panel for tissues.
- Wrap the Webbing: Pull the wet cane sheet tightly around the side panels and top of the box frame, securing it with hot glue.
- Trim and Polish: Trim off any overhang with sharp scissors, sand down the wooden edges, and let the cane dry so it shrinks tight.
Pro-Tip: Soak your cane webbing before gluing because it tightens up naturally as it dries, giving your finished cover a smooth, professional look.
19. Simple Wooden Spice Storage Rack:
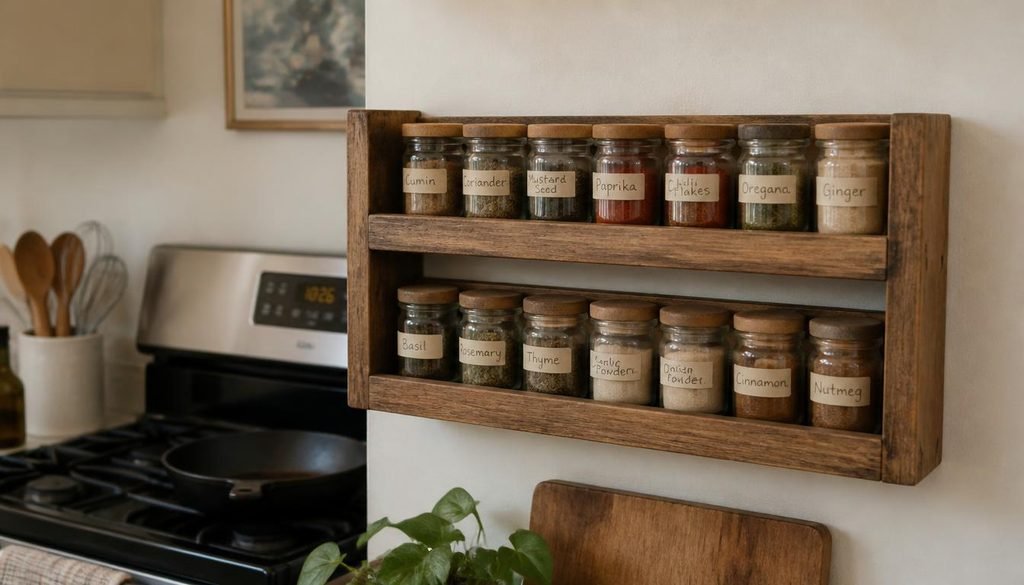
This wooden spice storage rack constructs a two-tier wall frame to display labeled glass jars near your stove. It demonstrates how to decorate your home on a low budget while simultaneously streamlining your kitchen organization.
Quick Stats:
- Estimated Cost: Under $22
- Time Required: 1 to 2 hours
Materials Needed:
- Smooth pine boards
- Wood glue and finish nails
- Dark walnut wood stain
- Wall hanging brackets with screws
Tools Required:
- Hand saw or miter saw
- Hammer
- Paintbrush or rag
- Bubble level
Step-by-Step DIY Method:
- Cut the Wood: Cut your pine boards into two vertical side pieces, two horizontal shelves, and two protective front lip strips.
- Nail the Frame: Glue and nail the horizontal shelves between the side panels to create a sturdy two-tier box frame.
- Attach Front Ledges: Fasten the thin front lip strips onto the shelf edges to keep spice jars from sliding off.
- Stain and Mount: Coat the wood with dark stain, let it dry completely, and screw the completed rack into your kitchen wall studs.
Pro-Tip: Measure your tallest spice jars before nailing the middle shelf to ensure every jar fits comfortably with plenty of overhead room.
20. Easy Fabric Catchall Storage Tray:
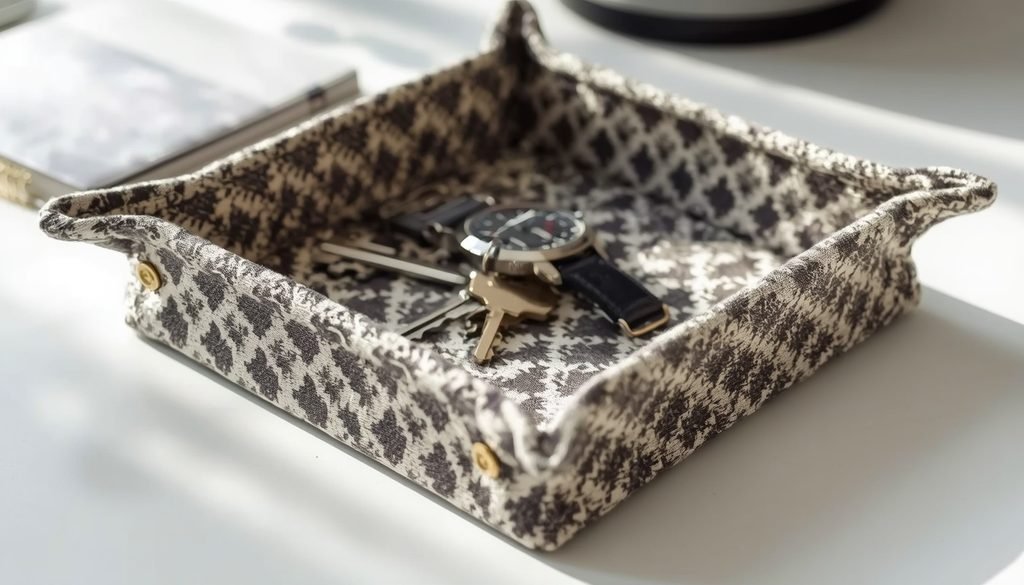
This fabric catchall tray snaps patterned cloth at the corners to hold keys, watches, and daily pocket items. Crafting small cloth organizers represents one of the simplest easy home decor projects for beginners looking for quick tabletop solutions.
Quick Stats:
- Estimated Cost: Under $10
- Time Required: 30 to 45 minutes
Materials Needed:
- Patterned cotton or canvas fabric
- Heavy iron-on interfacing sheet
- 4 sets of brass snap fasteners
- Matching thread
Tools Required:
- Fabric scissors
- Snap fastener setting tool
- Iron and ironing board
- Sewing machine or needle
Step-by-Step DIY Method:
- Cut the Squares: Cut two matching squares of fabric and one square of heavy iron-on interfacing to give the tray structure.
- Fuse and Stitch: Iron the interfacing onto the wrong side of one fabric square, stitch both squares face-to-face, and turn right side out.
- Finish the Edges: Press the edges flat with an iron and sew a clean topstitch line along all four sides.
- Attach Snaps: Install one brass snap set in each of the four corners, then pinch and snap them together to form the tray walls.
Pro-Tip: Unsnap the corners whenever you travel so the fabric tray folds completely flat inside your luggage.
21. Simple Wooden Board Cutting Block:
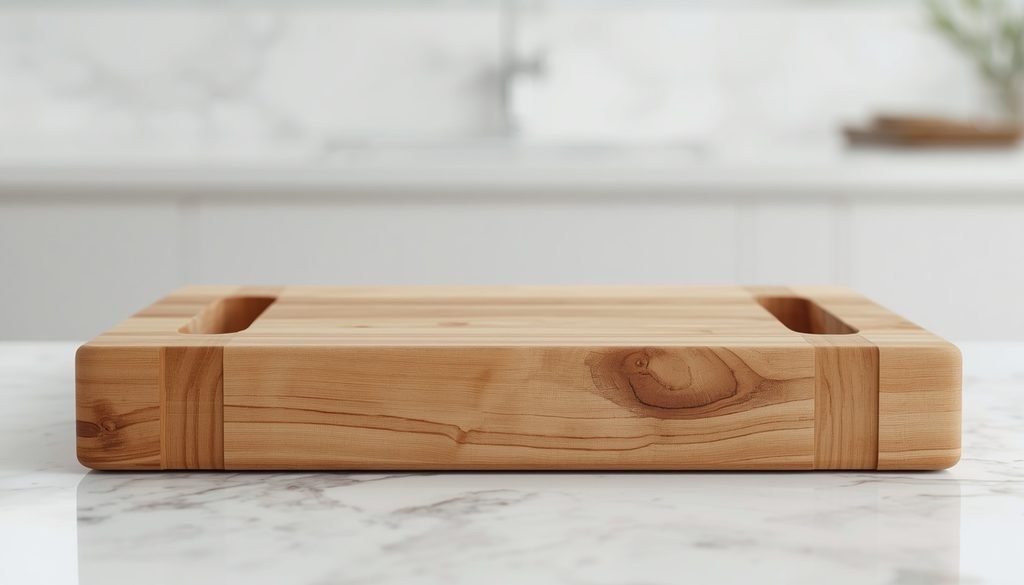
This wooden cutting block shapes a thick slab of timber with carved side handles for prep work on your kitchen countertops. It provides a durable surface for chopping food while adding a rustic, natural wood accent to your culinary space.
Quick Stats:
- Estimated Cost: Under $20
- Time Required: 1 to 2 hours
Materials Needed:
- Thick hardwood plank (such as maple or birch)
- Food-safe mineral oil
- Beeswax wood conditioner
Tools Required:
- Saw or router
- Sandpaper (various grits)
- Clean cotton cloth
- Pencil and ruler
Step-by-Step DIY Method:
- Shape the Wood: Cut your hardwood plank to the desired rectangular size and mark out recessed handle slots on both short ends.
- Carve the Handles: Use a router or hand tools to carve out smooth grip grooves along the side guidelines.
- Sand Smooth: Sand every surface, corner, and handle groove thoroughly using progressively finer sandpaper grits.
- Oil and Condition: Rub a heavy coat of food-safe mineral oil over the entire board, let it soak in, and seal it with beeswax.
Pro-Tip: Always use food-grade mineral oil rather than vegetable cooking oils, as cooking oils can spoil and turn rancid over time inside the wood.
22. Wooden Board Entryway Coat Rack:
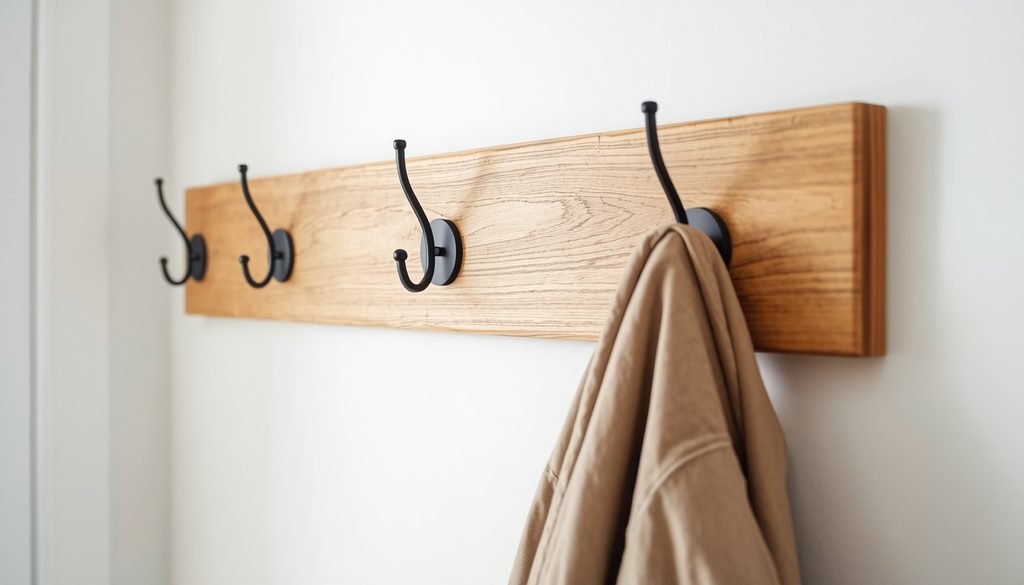
This wooden coat rack mounts black metal hooks onto a natural timber board to hang coats, bags, and hats. It is an essential build when creating modern entryway decor that delivers immediate organization for very little cost.
Quick Stats:
- Estimated Cost: Under $25
- Time Required: 45 minutes
Materials Needed:
- 1 rectangular wooden board
- 4 black metal coat hooks
- Wood stain or clear sealer
- Screws and heavy-duty wall anchors
Tools Required:
- Power drill and screwdriver bit
- Measuring tape and pencil
- Sandpaper
- Bubble level
Step-by-Step DIY Method:
- Sand and Stain: Sand the board smooth and apply a layer of wood stain.
- Mark Hook Points: Measure equal spaces along the board and mark four hook locations.
- Attach Hooks: Drill pilot holes and screw the metal hooks onto the board.
- Mount to Wall: Drill into the wall, insert anchors, and screw the rack flat using a level.
Pro-Tip: Secure the mounting screws directly into wall studs so the rack can support heavy winter coats without pulling loose.
23. DIY Key Holder Storage Box:
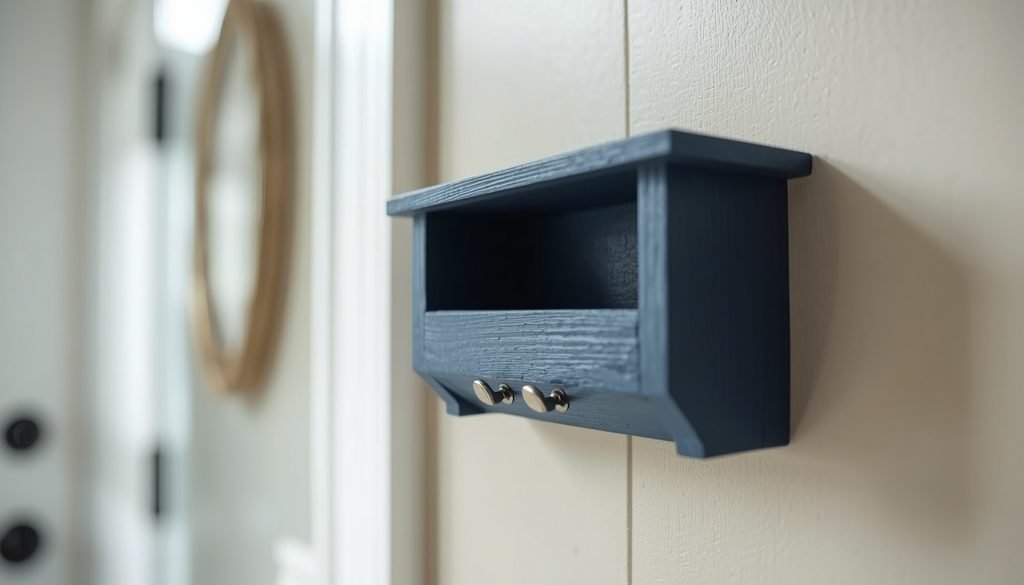
This DIY key holder storage box builds a wall-mounted wooden slot with bottom hooks to hold letters and car keys near your front door. It prevents daily mail clutter from piling up while ensuring you never misplace your keys again.
Quick Stats:
- Estimated Cost: Under $18
- Time Required: 1 hour
Materials Needed:
- Plywood or craft pine boards
- 2 small metal key hooks
- Slate blue paint
- Wood glue and finish nails
Tools Required:
- Small hammer
- Power drill and screwdriver
- Paintbrush
- Bubble level
Step-by-Step DIY Method:
- Assemble the Box: Glue and nail the wooden boards together to create an open mail cubby.
- Paint the Frame: Apply two coats of slate blue paint and let it dry completely.
- Attach Key Hooks: Screw two metal hooks evenly onto the bottom front panel.
- Mount to Wall: Drill anchors into the wall and screw the key box flat using a level.
Pro-Tip: Place a piece of painter’s tape over the screw locations when marking your wall to protect the paint finish.
24. Modern Arch Painted Accent Wall:
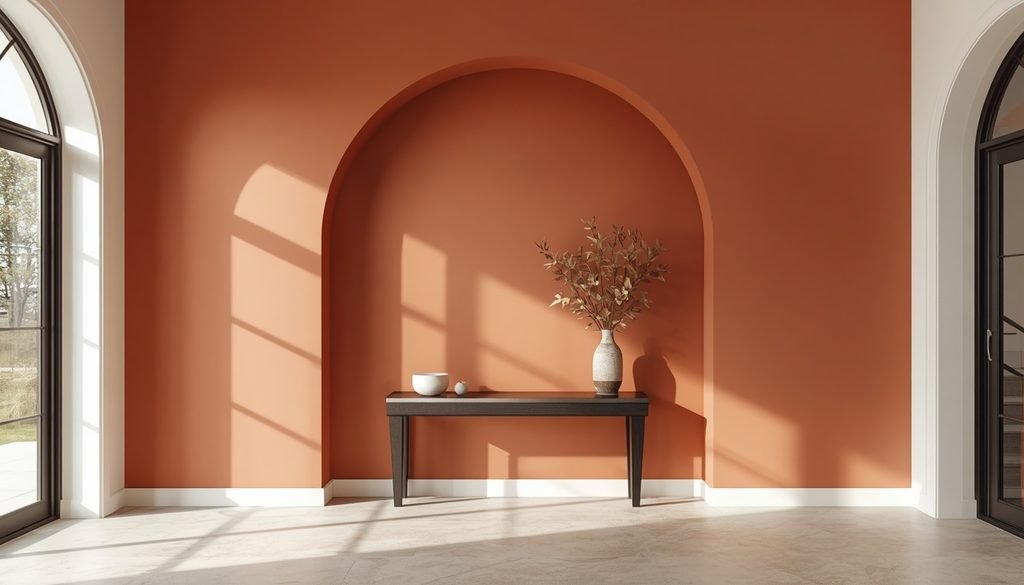
This painted arch accent wall uses rich terracotta paint to create a bold architectural focal point behind your entryway console. Painted arches serve as dynamic DIY decoration ideas for wall transformation without building physical alcoves or structural wall modifications.
Quick Stats:
- Estimated Cost: Under $50
- Time Required: 2 to 3 hours
Materials Needed:
- Terracotta indoor wall paint
- Painter’s tape
- String and pencil (for tracing arch)
- Small thumbtack or nail
Tools Required:
- Medium paint roller and tray
- Angle paint brush
- Measuring tape
- Spirit level
Step-by-Step DIY Method:
- Tape Vertical Lines: Measure wall width, mark side boundaries, and apply painter’s tape straight down using a level.
- Trace Top Arch: Tie string to a pencil, pin the string center between your tape lines, and swing the pencil to draw a smooth top curve.
- Outline the Edges: Paint along the pencil curve and tape boundaries carefully using your angled paint brush.
- Fill and Peel: Roll two coats of terracotta paint inside the arch outline, and then peel off painter’s tape while the paint is damp.
Pro-Tip: Remove the painter’s tape at a 45-degree angle while the second coat is still slightly wet to get crisp, sharp edges.
25. Decorative Wooden Shoe Storage Bench:
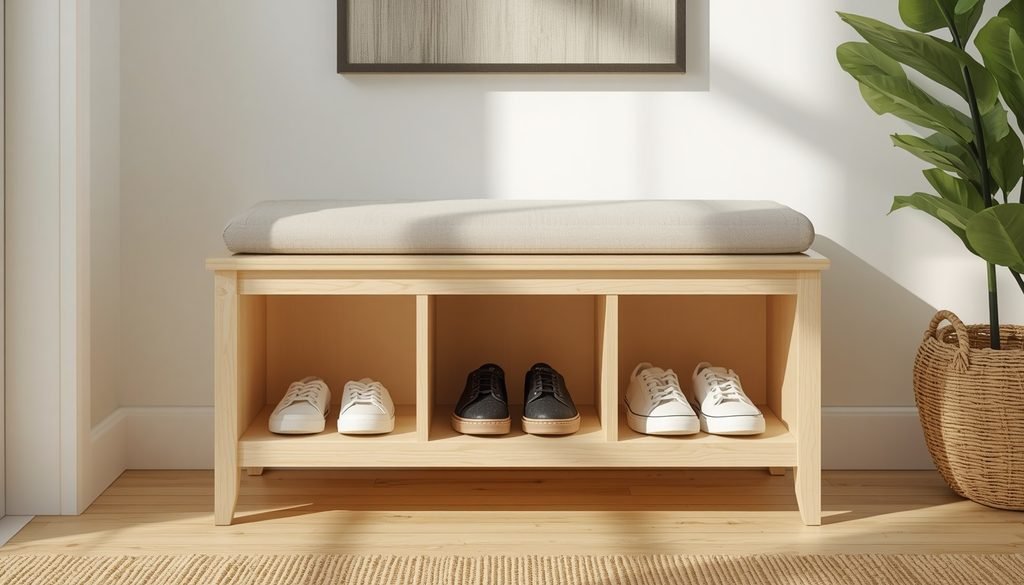
This wooden shoe storage bench builds a low open-cubby seat topped with a padded cushion to organize footwear near your front entrance. It provides a comfortable spot to sit while putting on shoes and keeps entryway clutter neatly off the floor.
Quick Stats:
- Estimated Cost: Under $65
- Time Required: 2 to 3 hours
Materials Needed:
- Smooth pine boards or plywood
- High-density foam bench pad
- Neutral upholstery fabric
- Pocket hole screws and wood glue
Tools Required:
- Circular saw or miter saw
- Pocket hole jig and drill
- Staple gun
- Sandpaper
Step-by-Step DIY Method:
- Build Outer Frame: Pocket-hole screw four pine boards together into a low rectangular box with feet.
- Install Dividers: Secure two vertical wood dividers inside the frame to form three equal shoe cubbies.
- Upholster Top Cushion: Wrap high-density foam and fabric over the top wood panel, stapling tightly underneath.
- Attach Cushion Top: Fasten the upholstered seat top securely onto the bench frame.
Pro-Tip: Add small felt pads to the bottom of the bench feet to prevent scratching hardwood or laminate flooring when moving it.
26. Custom Cut Framed Wall Mirror:
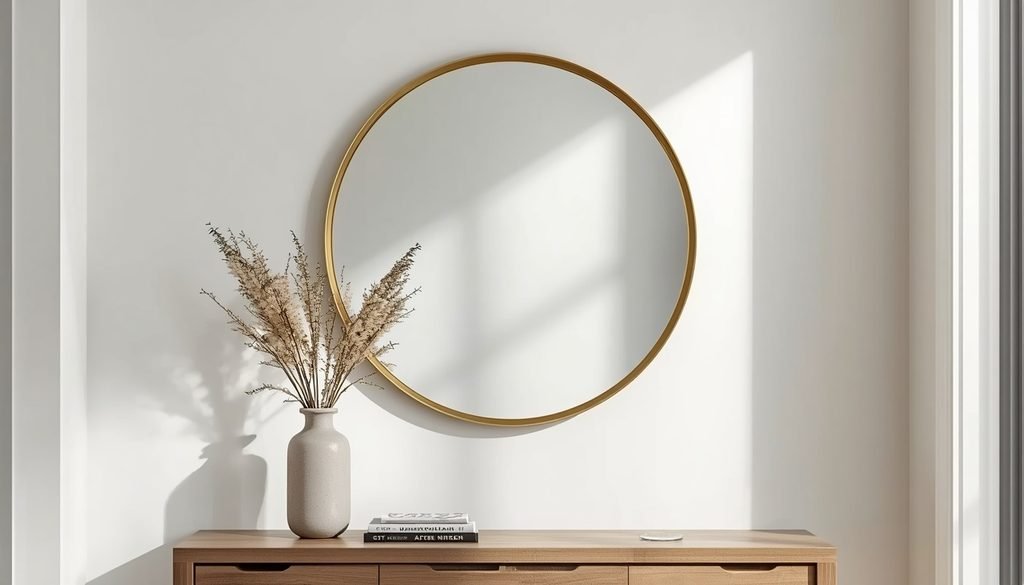
This framed wall mirror mounts a large round glass mirror cut with a clean bevel finish inside a slender brass trim to brighten up living rooms or entryways. Adding metallic trim creates high-end DIY decor on a budget that reflects natural light across your living space.
Quick Stats:
- Estimated Cost: Under $35
- Time Required: 1 hour
Materials Needed:
- Round frameless glass mirror
- Flexible gold or brass metal trim edge
- Mirror mounting hardware or heavy-duty adhesive
- Drywall anchors and screws
Tools Required:
- Utility knife or metal shears
- Heavy-duty construction adhesive gun
- Power drill
- Spirit level
Step-by-Step DIY Method:
- Wrap the Frame: Wrap the flexible brass trim around the edge of the round mirror and cut to exact size.
- Glue the Trim: Apply construction adhesive along the rim and press the brass trim tightly into place.
- Attach Mounts: Glue heavy-duty mirror hanging brackets securely onto the back center of the mirror.
- Mount to Wall: Install wall anchors, drive screws into the wall, and hang the mirror using a level.
Pro-Tip: Clean the back edge of the glass mirror with rubbing alcohol before applying adhesive to form a stronger bond.
27. DIY Geometric Painted Room Door:
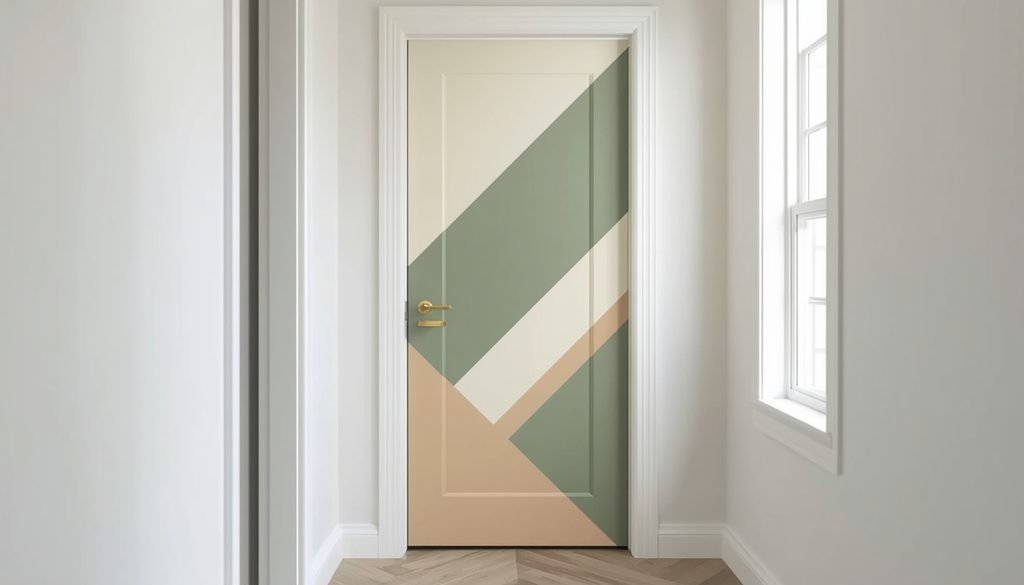
This geometric painted room door uses angled color block stripes to transform a plain interior door into modern wall art. It adds personality and visual interest to hallway corridors without replacing existing door hardware or woodwork.
Quick Stats:
- Estimated Cost: Under $25
- Time Required: 2 hours
Materials Needed:
- Sage green interior paint
- Beige interior paint
- Cream interior paint
- Painter’s tape
Tools Required:
- Small foam roller
- Paint tray
- Measuring tape
- Pencil
Step-by-Step DIY Method:
- Clean Door Surface: Wipe down the entire door to remove dust and dirt for smooth paint adhesion.
- Tape Diagonal Lines: Measure angled sections across the door and apply painter’s tape along the guidelines.
- Roll Color Sections: Fill each geometric taped shape carefully using a small foam roller and interior paint.
- Peel and Dry: Gently remove the painter’s tape while the paint is damp to reveal sharp lines.
Pro-Tip: Press tape edges down firmly with your thumbnail before painting to prevent bleeding under the lines.
28. Woven Rattan Wooden Storage Trunk:
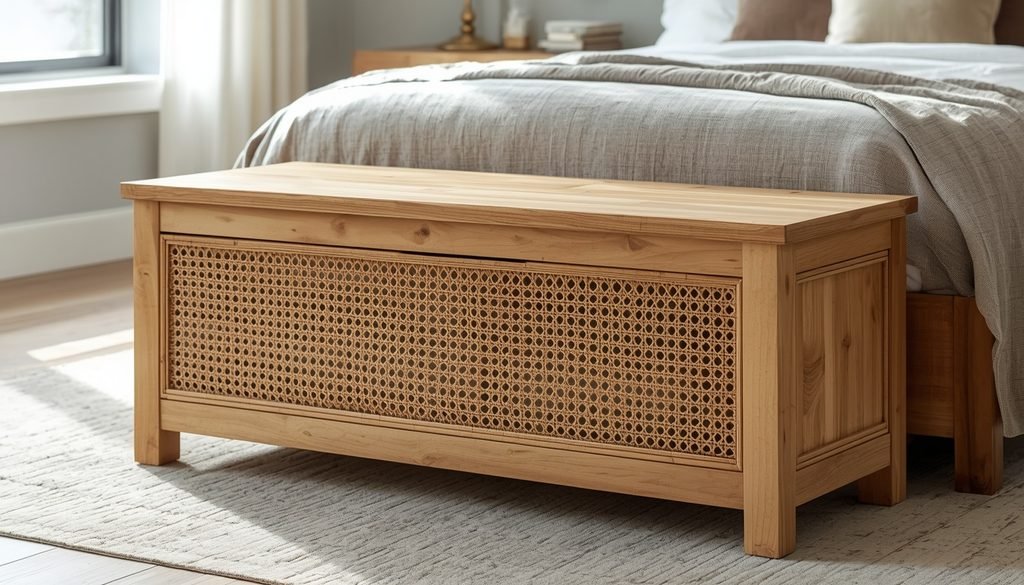
This woven rattan wooden storage trunk attaches cane webbing panels inside a natural pine frame to store extra blankets and bedroom essentials. It brings warm organic textures to your space, perfectly aligning with modern principles of affordable home interior design.
Quick Stats:
- Estimated Cost: Under $48
- Time Required: 2 to 3 hours
Materials Needed:
- Smooth pine boards
- Woven rattan cane webbing roll
- Lid hinges and support brackets
- Wood glue and pocket screws
Tools Required:
- Circular saw or miter saw
- Heavy-duty staple gun
- Power drill and screwdriver
- Sandpaper
Step-by-Step DIY Method:
- Build Frame: Screw pine boards together to assemble the trunk body.
- Attach Rattan: Soak, stretch, and staple cane webbing onto the front.
- Install Lid: Fasten the wooden top lid using hinges and support brackets.
- Sand Finish: Sand all rough wooden edges smooth for a clean look.
Pro-Tip: Soak cane webbing in warm water for 30 minutes before stapling so it dries completely flat and pulled tight.
29. Decorative Dried Flower Glass Frame:
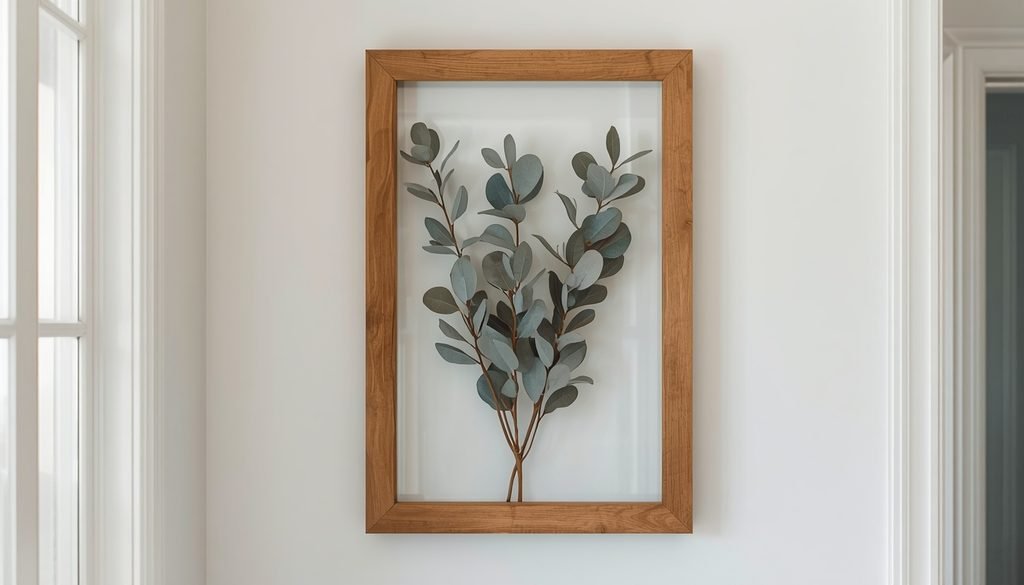
This floating glass frame presses dried botanical stems between two glass panes inside a natural wood frame. If you want to refine your living room wall decor, framing delicate greenery is one of the easiest ways to bring subtle elegance to your space.
Quick Stats:
- Estimated Cost: Under $20
- Time Required: 45 minutes
Materials Needed:
- Double-glass floating picture frame
- Dried eucalyptus stems or pressed flowers
- Clear floral glue or craft adhesive dots
- Picture hanging hardware
Tools Required:
- Glass cleaner and microfiber cloth
- Tweezers
- Hammer
- Spirit level
Step-by-Step DIY Method:
- Clean Glass: Wipe glass panes clean to remove dust and smudges.
- Arrange Botanicals: Lay dried eucalyptus stems flat on the back glass pane.
- Secure Glass: Seal the top glass pane firmly to sandwich stems inside.
- Mount Frame: Attach wall hook and hang frame straight using a level.
Pro-Tip: Use a tiny drop of clear craft glue behind the central stem to prevent the foliage from slipping over time.
30. Custom Fabric Covered Notice Board:
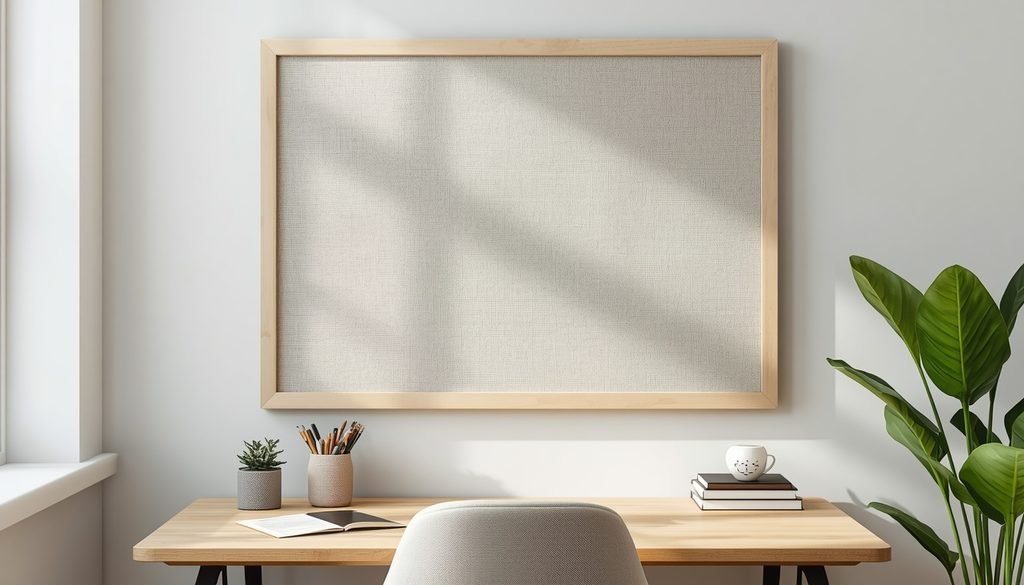
This fabric-covered notice board wraps textured linen over a cork base to keep notes, photos, and reminders neatly organized. It is ideal if you want to stylishly decorate your office space while replacing plain stationery items with soft, aesthetic wall organizers.
Quick Stats:
- Estimated Cost: Under $22
- Time Required: 1 hour
Materials Needed:
- Cork board with wooden frame
- Neutral linen fabric
- Heavy-duty spray adhesive
- Picture hanging hardware
Tools Required:
- Heavy-duty staple gun
- Fabric scissors
- Power drill and screws
- Spirit level
Step-by-Step DIY Method:
- Cut Fabric: Trim linen piece slightly larger than the cork board frame.
- Wrap Cork: Stretch fabric tightly over the cork face and staple behind frame edges.
- Trim Excess: Cut away extra loose fabric along the back border neatly.
- Mount Board: Drive screws into the wall and mount the board straight using a level.
Pro-Tip: Iron the linen fabric before wrapping to ensure there are no wrinkles or creases on the finished notice board.
31. Aesthetic Clay Wall Sconce Candle Holders:
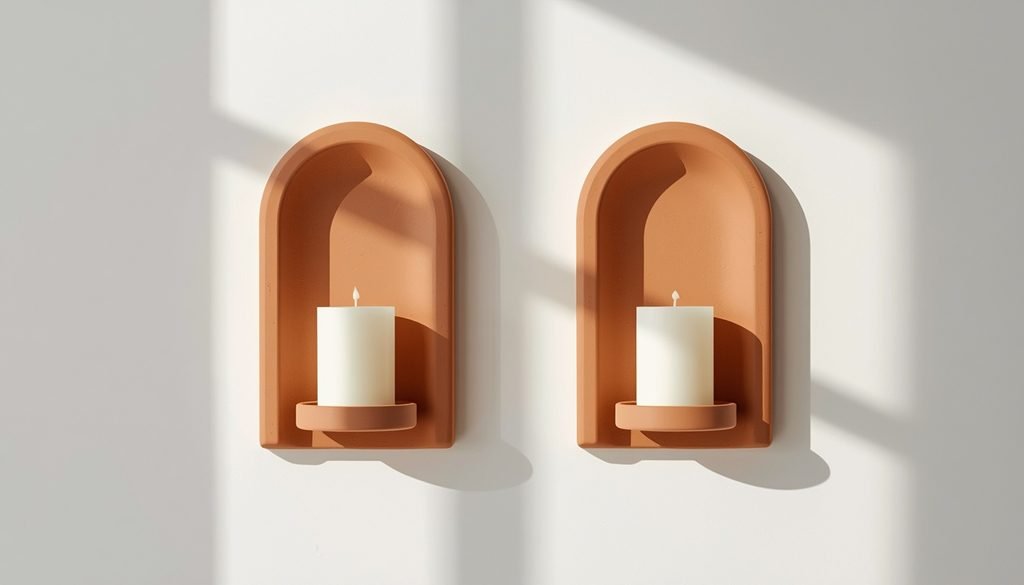
This clay wall sconce set crafts arched terracotta alcoves with small ledges to display pillar candles on your wall. Sculpted sconces introduce warm, ambient lighting, making them excellent DIY decoration ideas for wall mounting in quiet hallways or seating areas.
Quick Stats:
- Estimated Cost: Under $18
- Time Required: 1.5 hours
Materials Needed:
- Air-dry clay (terracotta color)
- LED flameless pillar candles
- Heavy-duty mounting strips or keyhole brackets
- Clear matte sealant
Tools Required:
- Rolling pin
- Clay knife or craft blade
- Smooth sponge
- Sandpaper
Step-by-Step DIY Method:
- Shape Clay: Roll clay flat and cut out arched alcove shapes with bottom ledges.
- Smooth Edges: Use a damp sponge to round edges and smooth out surface imperfections.
- Dry and Seal: Let clay air-dry completely, then coat with clear matte sealant.
- Mount to Wall: Secure keyhole brackets on the back and mount sconces onto the wall.
Pro-Tip: Always use flameless LED pillar candles instead of real wax candles to protect the clay from heat damage and keep your walls safe.
32. Aesthetic Woven Macramé Wall Hanging:
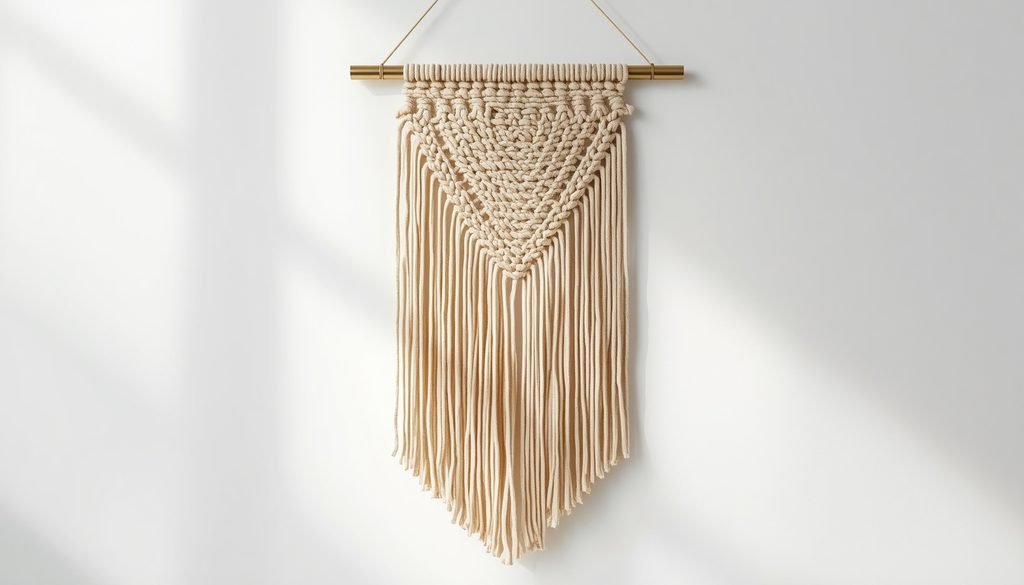
This woven macramé wall hanging knots cotton cord onto a brass rod to create a textured, bohemian art piece. It brings warmth, dimension, and handcrafted elegance to empty bedroom or living room walls.
Quick Stats:
- Estimated Cost: Under $18
- Time Required: 1.5 to 2 hours
Materials Needed:
- 4mm natural cotton macrame cord
- Brass dowel rod or wooden bar
- Brass hanging wire or cord
- Wall hook
Tools Required:
- Fabric scissors
- Measuring tape
- Fine-tooth comb
Step-by-Step DIY Method:
- Attach Cords: Loop cord strands onto the brass rod using lark’s head knots.
- Knot Pattern: Tie square knots in diagonal rows to form the central chevron shape.
- Trim Fringe: Cut bottom cord ends into a sharp V-shape using fabric scissors.
- Hang Piece: Attach hanging wire to rod ends and mount onto a wall hook.
Pro-Tip: Lightly comb out the bottom fringe with a fine-tooth comb and trim slightly once more for a clean, feathered finish.
33. DIY Fluted Wooden Plant Pedestal:
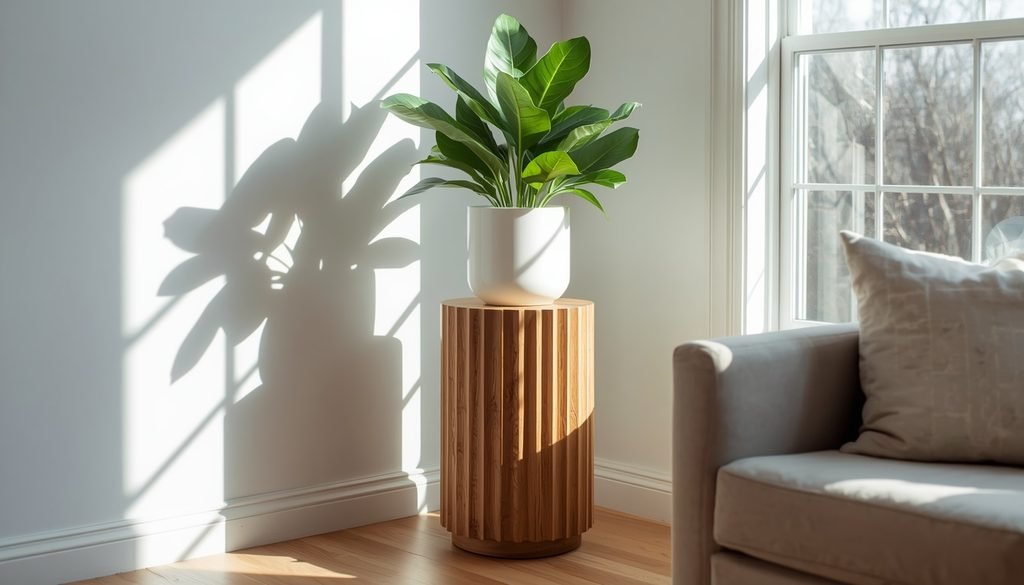
This fluted wooden plant pedestal wraps half-round wood moldings around a cylindrical base to showcase potted greenery. Pedestals lift greenery off floor surfaces, offering smart home decor ideas for small spaces while adding warm wood tones to living room corners.
Quick Stats:
- Estimated Cost: Under $30
- Time Required: 1.5 to 2 hours
Materials Needed:
- Heavy-duty cardboard Sonotube or concrete form tube
- Half-round wooden moldings or wooden dowels
- Round wooden top board and base disc
- Strong construction adhesive
Tools Required:
- Miter box and hand saw
- Fine-grit sandpaper
- Caulking gun
- Measuring tape
Step-by-Step DIY Method:
- Cut Moldings: Saw half-round wooden moldings to match the height of your core tube.
- Attach Slats: Glue wooden moldings tightly around the cylindrical base using construction adhesive.
- Cap Top: Secure the round wooden top board onto the upper rim of the pedestal.
- Sand Finish: Sand all wood surfaces smooth and apply a protective clear coat or stain.
Pro-Tip: Wrap painter’s tape or heavy rubber bands around the cylinder while the adhesive cures to hold the wooden slats firmly against the tube.
34. Custom Woven Rope Ottoman Stool:
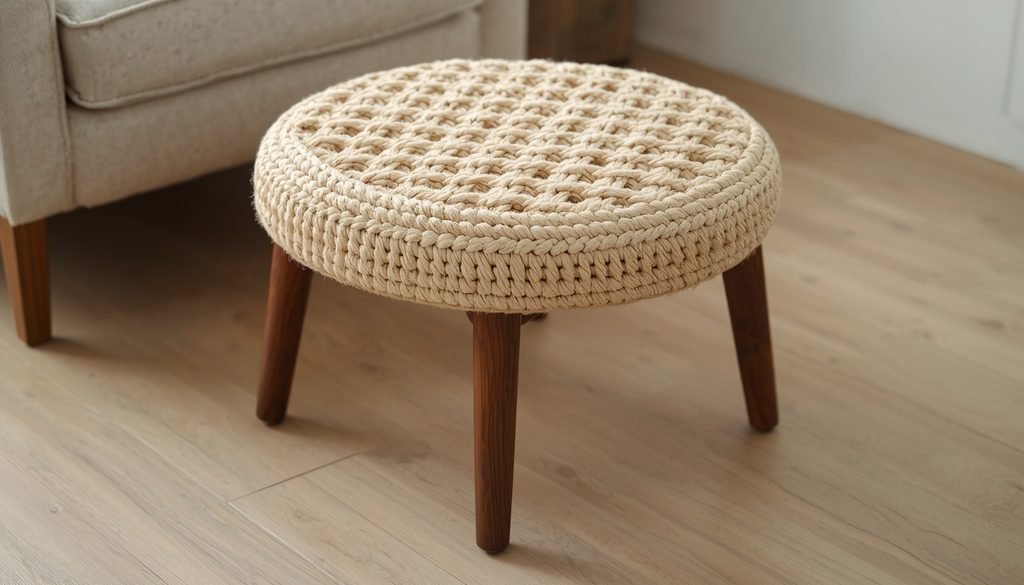
This woven rope ottoman stool weaves thick cotton cord over a padded wooden base to craft a comfortable footrest. If you want to know how to decorate your home on a low budget, building your own custom cord ottoman costs a fraction of store-bought accent furniture.
Quick Stats:
- Estimated Cost: Under $35
- Time Required: 2 to 2.5 hours
Materials Needed:
- Round wooden seat base
- Tapered wooden furniture legs with top plates
- Thick cotton cord or macramé rope
- High-density upholstery foam cushion
Tools Required:
- Heavy-duty staple gun
- Power drill and screws
- Hot glue gun
- Fabric scissors
Step-by-Step DIY Method:
- Attach Legs: Screw leg mounting plates and tapered legs onto the bottom wooden base.
- Cushion Top: Glue round foam padding securely onto the upper side of the seat.
- Weave Rope: Braid or coil thick cotton cord tightly over the foam top and sides.
- Staple Underside: Secure all rope ends underneath the baseboard using heavy-duty staples.
Pro-Tip: Apply a drop of hot glue underneath each cord layer as you wrap to keep the woven pattern tight and prevent shifting over time.
35. Modern Floating Acrylic Wall Calendar:
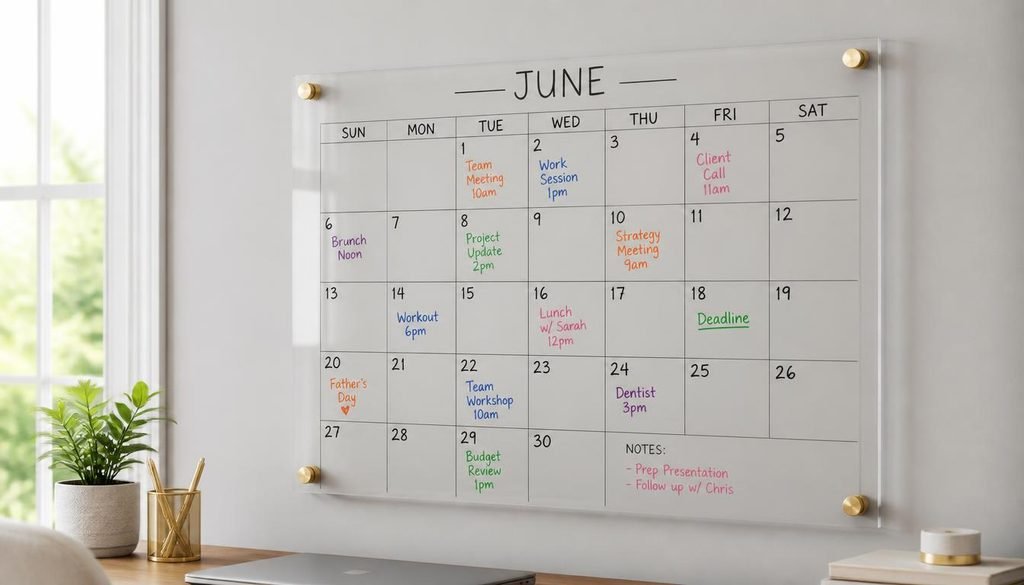
This floating acrylic wall calendar mounts a clear plastic sheet with brass standoffs to create a reusable schedule planner. Clean acrylic boards represent quintessential modern aesthetic DIY room décor for teens, combining daily task tracking with modern office styling.
Quick Stats:
- Estimated Cost: Under $30
- Time Required: 1 hour
Materials Needed:
- Clear acrylic sheet
- Brass wall standoff hardware
- Dry-erase vinyl calendar grid decal or permanent paint pen
- Wall anchors and screws
Tools Required:
- Power drill and drill bits
- Measuring tape and ruler
- Spirit level
- Pencil
Step-by-Step DIY Method:
- Mark Grid: Draw calendar lines onto the back side using a permanent marker or decal.
- Drill Corners: Drill four corner mounting holes through the acrylic sheet carefully.
- Mount Standoffs: Anchor standoff bases into the wall using a level for alignment.
- Attach Sheet: Screw decorative brass cap barrels onto standoffs to secure the calendar.
Pro-Tip: Draw or stick the grid outline on the back of the acrylic sheet, so dry-erase markers won’t rub off the permanent lines when you wipe away monthly notes.
Conclusion:
Upgrading your home doesn’t have to be expensive or complicated. With these practical DIY home decor ideas, you can bring fresh style and smart decoration items to every room on a simple budget.
Every idea in this article comes from real, hands-on experience. We have personally built, tested, and refined each of these projects in actual home redesigns. Because we know what works, what tools you need, and how long each step takes, you can jump into any project knowing you’ll get great results.
Now it’s your turn to get creative! Look around your house, pick the area you want to update, and choose a project that fits your style, space, and budget. Start with one simple project, pick colors and materials you love, and enjoy transforming your home with your own hands!
Frequently Asked Questions (FAQs):
How do I choose the easiest DIY home decor project to start with?
Begin with simple DIY home decor ideas like dried flower glass frames, fabric notice boards, or clay wall sconces. Pick a small budget-friendly project that solves a quick problem—like storing extra blankets or organizing keys—to build your crafting confidence.
How do I customize DIY home styling ideas to match my interior design?
Treat the structural steps as a base, and then match the finishes to your home palette. Swap out wood stains, wall paint colors, or fabric textures so your handmade home decor seamlessly blends with your existing furniture and wall colors.
What is the best way to keep custom home decor builds budget-friendly?
Buy raw craft supplies like pine boards, jute cord, or air-dry clay in standard sizes from local hardware stores. You can also upcycle old household items or reuse wood scraps to execute affordable DIY home decor ideas on a budget.
How do I safely mount heavy wooden wall decor without damaging walls?
Use a stud finder to anchor heavy DIY blanket racks or wooden shelves directly into wall studs. If hanging on plain drywall, use heavy-duty wall anchors or toggle bolts that support the specific weight of your home decor piece.
Can I use cheaper wood or materials for premium home decor designs?
Yes. Affordable pine boards, plywood, and MDF are great substitutes for expensive hardwoods, especially when finished with a quality wood stain or paint. Simple materials like cotton rope and air-dry clay also help you craft high-end DIY decor on a budget.
How do I make handmade room decor last longer?
Seal all wooden DIY projects with a clear polyurethane coat or wood wax to prevent moisture damage and scratches. For natural fibers like rattan, jute, or macramé cords, keep them clean and dry to preserve their texture over time.
What should I do if I make a mistake while crafting a home project?
Measure twice before cutting to prevent simple errors. If you cut wood slightly short or leave a small gap, use wood filler, sand it smooth, and paint over it—minor mistakes can easily be fixed without starting over.

Muhammad Imran is a professional content writer and home interior designer with over 10 years of high experience. He holds a Master’s Degree and has deep expertise in home improvement, home decor, kitchen design, and bathroom remodeling. Through Master Home Decor, he works as a content writer to share his real-world experience and simple, high-quality ideas to help readers create their dream homes.