Introduction to Peel and Stick Floor Tiles:
Peel and stick floor tiles are an excellent option for home renovation projects. They are self-adhesive tiles that can be easily installed without the need for glue or grout. They typically have a backing that can be peeled off to reveal an adhesive surface, allowing them to be stuck directly onto clean and smooth flooring surfaces.
Most of the peel and stick floor tiles are designed to be waterproof, especially those made from vinyl. These tiles are commonly used as a convenient and cost-effective option for DIY flooring projects in various areas, such as kitchens, bathrooms, living room, and utility rooms.
In this article, we’ll explore peel-and-stick floor tiles, their advantages, different patterns and sizes, compatibility with surfaces, tools needed for installation, a step-by-step guide for installing them, and tips for safety and maintenance.

Content Outlines for Understanding How to Install Peel and Stick Floor Tiles:
A. Benefits of using waterproof peel and stick floor tiles
B. Different patterns and sizes
C. Installation Possibilities: Where It Can Be Installed
D. Limitations in Application: Where It Can’t Be Installed
E. Necessary Tools for the Installation process
F. Step-by-step process for how to install peel and stick floor tiles
G. Safety and Maintenance
Conclusion:
Frequently Asked Questions (FAQs):
A. What are the benefits of using waterproof peel and stick floor tiles?
Before starting the process of How to Install Peel and Stick Floor Tiles: it is very important to know about these floor tiles. These tiles are Effortlessly stylish and hassle-free, and they also redefine flooring with their simple application and versatile designs. These tiles are typically made from a combination of vinyl and adhesive materials. Water-resistant peel-and-stick floor tiles come with numerous benefits.

1. Resistance to Water:
Firstly, they are highly resistant to water damage, making them ideal for use in areas prone to moisture, such as bathrooms, kitchens, and basements.
2. Easy Installation:
They are simple to install and require no specialized tools or skills.
3. Cost-Effective:
Peel and stick plank are generally more affordable compared to traditional flooring options.
4. Durability:
These tiles are also durable and low-maintenance, requiring minimal effort to clean and maintain their appearance.
5. Versatility:
They come in a wide range of colors, patterns, and styles, allowing for creative customization.
6. Removability:
These tiles can be easily removed without causing damage to the underlying surface, making them ideal for renters or temporary installations.
7. Low Maintenance:
These self-adhesive tiles are easy to clean and maintain, requiring only regular sweeping and occasional mopping.
8. Quick Transformation:
They provide a quick and effective way to update the look of a room or space with minimal time and effort.
B. Different patterns and sizes for peel-and-stick floor tiles:
Peel and stick floor tiles come in a variety of patterns and sizes to suit different preferences and needs. Some common patterns include geometric designs, wood-look planks, marble-look slabs, mosaic patterns, and solid colors. As for sizes, self-adhesive tiles typically range from small squares or rectangles to larger planks, allowing for flexibility in design and installation.
Whether you prefer a classic look, a modern aesthetic, or something in between, there are self-stick plank available to match your style and space requirements. Here are some common sizes and patterns for your information.

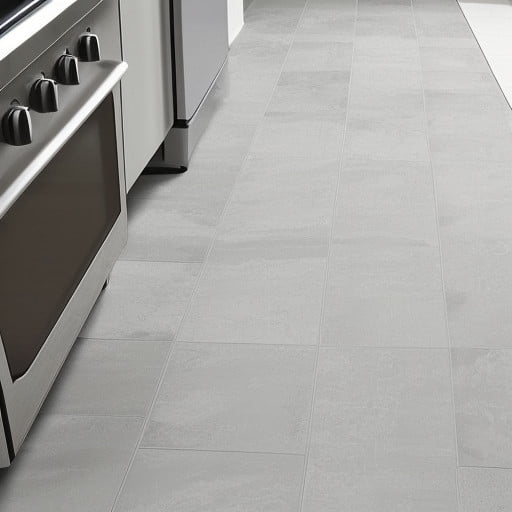
1. 12×12 peel and stick floor tile:
These 12×12 peel and stick floor tiles come in a variety of patterns, offering versatility and flexibility for different design preferences. Their square shape and manageable size make them easy to work with, allowing for creative layouts and arrangements. One of the key advantages of the 12×12 size is its suitability for smaller rooms like bathrooms and small kitchens, where larger tiles may not fit well or may require more cutting.
For example, in a standard 10×10 foot of room, you would need approximately 100 square feet of flooring. With 12×12 tiles, each slab covers 1 square foot, so you would need around 100 tiles to cover the entire floor. This makes it easy to calculate the quantity needed for your project and ensures minimal waste.
2. White peel and stick floor tile:
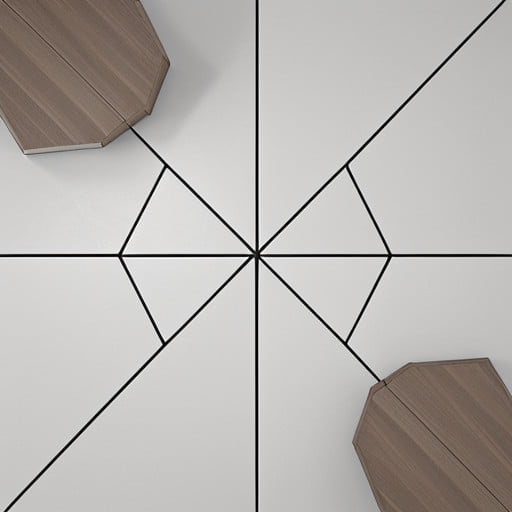
White peel-and-stick floor tiles are great because they make rooms look bigger and cleaner with their bright color. They’re perfect for rooms with few windows since they bounce light around, making everything brighter. You can use them in kitchens, bathrooms, bedrooms, teens room and living areas, and they go well with any style of decor, from modern to classic.
Available in sizes like 12×12, 18×18, and more, these white self-adhesive floorings cater to different room dimensions and layout preferences. When matching them with existing color schemes, consider pairing white tiles with soft pastels for a serene and airy ambiance, or with bold accent colors for a striking contrast.
For example, in a 14×14 feet dimension of the master bedroom, these white adhesive tiles can create a timeless and elegant foundation. Pair them with light gray walls and accents of blush pink or navy blue for a sophisticated yet cozy atmosphere.
3. Hexagon peel and stick floor tile:
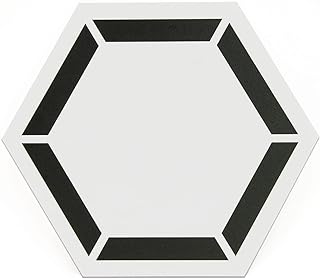
Hexagon peel-and-stick flooring planks offer a unique and eye-catching pattern that adds visual interest to any space. Available in various sizes, including 12×12 and larger dimensions, these tiles cater to different room layouts and preferences.
With a range of colors available, from classic white to bold hues, hexagon tiles can complement a variety of interior design. Ideal for areas like bathrooms, kitchens, and entryways, their geometric design adds a modern touch to the decor.
For example, in a 12×12-foot room, opting for white hexagon Adhesive tiles can create a fresh and modern look. Pairing these tiles with soft gray walls and accents of pale blue or mint green can enhance the serene ambiance of the space.
Adding touches of metallic accents like gold or silver can elevate the decor, while incorporating natural elements such as wood or rattan furniture can add warmth and texture to the room.
4. Black and white peel and stick floor tiles:
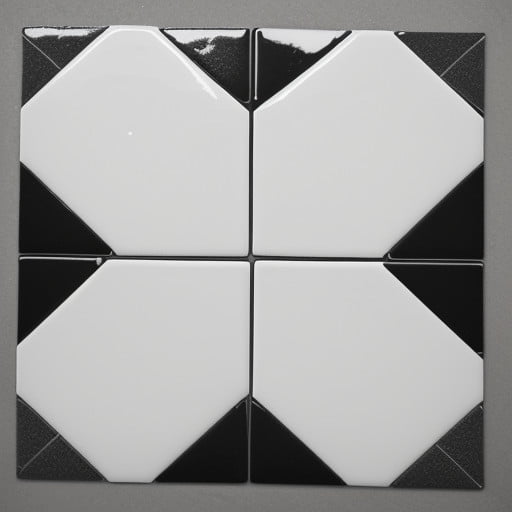
These black and white self-adhesive flooring plank are classic and versatile, fitting well with different room styles. They come in various sizes like 12×12 and 18×18, and are more suitable for different room dimensions. Their monochrome design allows for flexible color pairing, making them ideal for kitchens, bathrooms, and bedrooms, adding a touch of sophistication to any space.
For an example of a master bedroom sized 14×16 feet, consider using 12×12 or 18×18 black and white adhesive-backed tiles. A quantity of approximately 224 tiles (assuming a 12×12-inch size) would be needed to cover the entire floor area. To enhance the room’s ambiance, pair the tiles with white or light gray walls for a modern and elegant look. Accentuate the space with touches of black through decor items like pillows, throws, or artwork to create a cohesive and stylish theme.
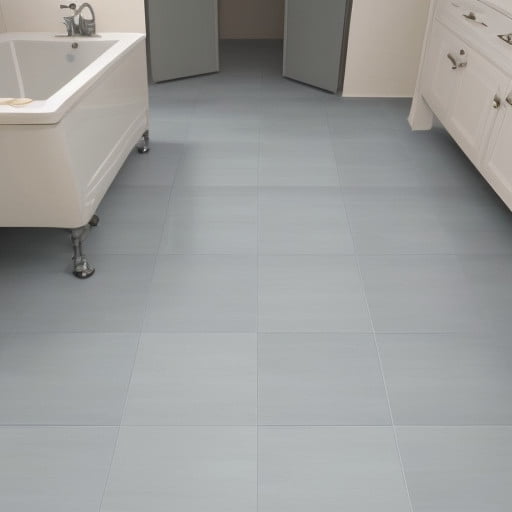
5. Gray peel and stick floor tiles
Gray peel-and-stick flooring offer a modern and sleek aesthetic suitable for various interior designs. Available in sizes like 12×12 and 18×18 and more, they cater to different room dimensions.
For example, in a 12×14 foot master bedroom, opting for 18″x18″ tiles, you would need approximately 100 tiles to cover the floor. To enhance the room’s ambiance, consider pairing gray tiles with light-colored walls and furniture for a contemporary look. Incorporating vibrant accents in colors like teal, mustard yellow, or coral can add visual interest and depth to the space.
C. Installation Possibilities: Where It Can Be Installed:
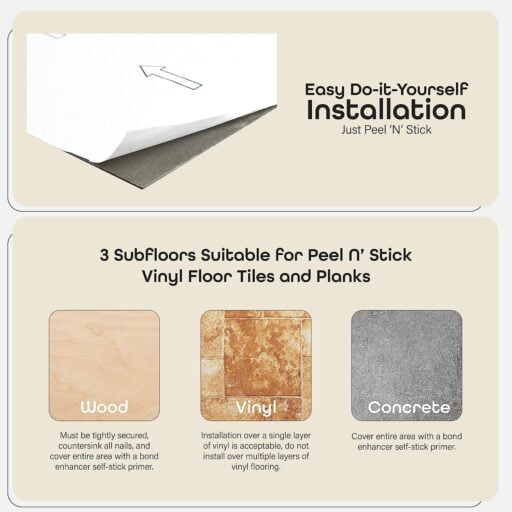
Peel and stick floor tiles can be installed on a variety of surfaces, including:
1. Smooth and clean floors:
These tiles adhere well to smooth and clean surfaces such as hardwood, plywood, vinyl, and linoleum.
2. Concrete floors:
They can be applied directly onto concrete floors as long as the surface is smooth and free of debris.
3. Existing Tile floors:
Peel and stick tiles can be installed over existing tile floors as long as the tiles are in good condition and the surface is clean and flat.
4. Walls:
In some cases, these tiles can also be installed on walls to create a decorative backsplash or accent wall.
5. Other surfaces:
These tiles may also work on surfaces such as metal, glass, and certain types of countertops, but it’s essential to check the manufacturer’s recommendations for compatibility.
D. Limitations in Application: Where It Can’t Be Installed:
Peel and stick floor tiles may not be suitable for installation on certain surfaces, including:
1. Uneven or damaged floors:
If the floor surface is uneven, cracked, or damaged, the adhesive may not adhere properly, leading to an uneven installation and potential issues with durability.
2. Carpeted floors:
Peel and stick tiles are designed to adhere to hard surfaces, so they may not stick well to carpeted floors.
3. High-moisture areas:
While some peel-and-stick tiles are water-resistant, they may not be suitable for installation in areas prone to excessive moisture, such as showers or outdoor spaces exposed to the elements.
4. Extreme temperatures:
Peel and stick tiles may not perform well in environments with extreme temperatures, such as unheated or uninsulated spaces subject to freezing temperatures.
5. Porous surfaces:
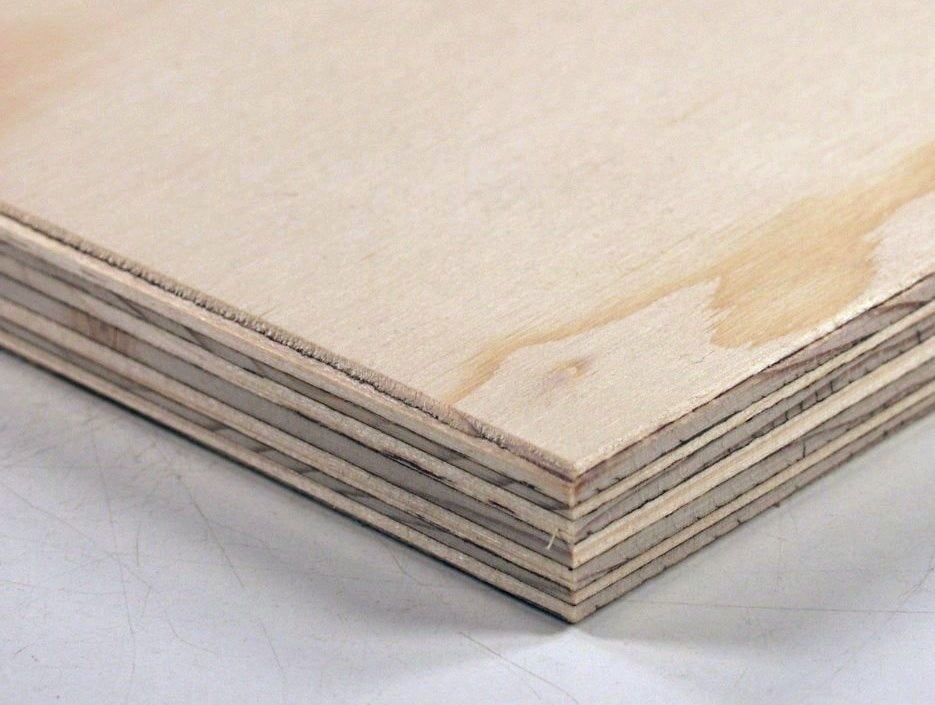
Surfaces with high porosity, such as unfinished wood, strand particle board, weak plyboard, particle board, or porous concrete, may not provide a suitable base for self-stick tiles, as the adhesive may not bond effectively.


E. Necessary Tools for the Installation of Peel and Stick Floor Tiles:
1. Tap measure
2. Pencil
3. Chalk Reel Marker
4. Carpenter square
5. Utility knife
6. Heavy Duty Scissors
7. Roller
8. Pre-mix grout
9. Grout floater
10. Tile spacer
11. Ammonia-based cleaner
12. Scrubbing pad
13. Sponges
14. Buckets of water
F. Step By Step process for how to install peel and stick floor tiles:
Here’s a simplified step-by-step guide for installing these self-adhesive floor tiles in a 12 x 12 room size dimension using 12-inch x 12-inch tiles:
1. Prepare the Surface:
Start by thoroughly cleaning the room surface with an ammonia-based cleaner and scrubbing pad. Ensure the surface is free of dirt and debris for proper adhesion.
2. Measure and Plan:
Locate the center of the room and mark it with a pencil. Use a chalk reel marker to create guidelines from the center to each wall, dividing the room into four quadrants.
3. Cut Tiles to Fit:
If your room measures 12 x 12 feet and you’re using 12×12-inch tiles, large cutting may not be necessary, especially if the room is square. Simply measure each quadrant’s dimensions, mark them on the back of the tiles, and trim as needed with a utility knife or heavy-duty scissors for a precise fit.
4. Apply Tiles:
Starting in one quadrant, peel off the backing from the first tile and align it with the guideline. Press the tile firmly into place, ensuring proper adhesion. Use a roller to remove air bubbles and secure the surface.
5. Add Spacers:
Place tile spacers between each tile to maintain even spacing and alignment. This step ensures a professional-looking finish and helps prevent tiles from shifting during installation.
6. Continue Installation:
Work one quadrant at a time, repeating the process until the entire room is covered with tiles. Trim any excess tiles as needed to fit along the edges of the room.
7. Apply Grout (Optional):
If desired, apply pre-mix grout between the tiles using a grout floater. Follow the manufacturer’s instructions for mixing and applying the grout, then use a sponge to remove any excess grout from the tile surfaces.
8. Clean Up:
Once the tiles and grout (if applicable) have been installed, clean the floor surface with a damp sponge and buckets of water. Rinse thoroughly to remove any residue, then allow the floor to dry completely.
9. Final Touches:
Inspect the installation for any loose tiles or uneven edges. Use a utility knife to trim any rough edges and make any necessary adjustments for a seamless finish.
10. Enjoy Your New Floor:
Once the installation is complete and the floor has dried after 24 hours, you can enjoy your newly installed peel-and-stick tiles in your 12 x 12 room.

G. Safety and Maintenance:
Here are some basic safety and maintenance tips for peel and stick floor tiles:
1. Regular Cleaning:
Clean the floor regularly with mild detergent and water to remove dirt, dust, and spills. Avoid abrasive cleaners or harsh chemicals, which can damage the tiles.
2. Gentle Maintenance:
Use a soft mop or cloth for routine cleaning to prevent scratching the tile surface. Avoid abrasive scrubbers or brushes that may cause damage over time.
3. Protect Floor from Heavy Furniture:
Use felt pads or furniture coasters under the legs of heavy furniture to safeguard against scratches and dents.
4. Prompt Spill Cleanup:
Wipe up spills promptly to prevent moisture from seeping under the tiles and causing lifting or warping. Use a dry cloth or mop to absorb spills quickly.
5. Avoid Excessive Moisture:
While peel-and-stick tiles are water-resistant, prolonged exposure to moisture can weaken the adhesive. Ensure bathrooms and kitchens are well-ventilated and use rugs or mats in high-moisture areas.
6. Inspect Regularly:
Periodically inspect the tiles for signs of damage, lifting, or wear. Replace any damaged tiles promptly to maintain the integrity of the floor and prevent further issues.
7. Protective Measures:
Consider applying a sealant or protective coating to enhance durability and protect against scratches and stains. Follow the manufacturer’s guide for the best results.
Conclusion:
In conclusion, peel and stick floor tiles provide a hassle-free solution for DIY flooring projects. With easy installation and a variety of design options, they offer versatility and convenience. By following the outlined installation process and using the necessary tools, achieving professional-looking results is achievable.
With different patterns, colors, and sizes available, these tiles allow for customization to match any style. Whether you’re renovating your kitchen, bathroom, or any other room, peel-and-stick tiles offer a budget-friendly and stylish option. This blog post aims to guide you through the process, empowering you to enhance your space with confidence.
Frequently Asked Questions (FAQs):
1. How do I prepare the floor for peel-and-stick tiles?
To prepare the floor, start by cleaning it thoroughly to remove any dirt, dust, or debris. Make sure the surface is flat and doesn’t have any bumps or rough patches. For concrete floors, make sure they are completely dry before proceeding.
2. How do I cut peel-and-stick floor tiles?
Measure the area you need to cover and mark the tiles accordingly. Then, use a utility knife or heavy-duty scissors to carefully cut along the marked lines.
3. How do I prepare a concrete floor for peel-and-stick tiles?
Clean the concrete floor thoroughly and ensure it’s completely dry. Remove any existing coatings or adhesives. Patch any cracks or imperfections, and then sand the surface to create a smooth and even base for the peel-and-stick tiles.
4. Can I install peel-and-stick tiles over existing flooring?
Yes, peel-and-stick tiles can typically be installed over existing flooring as long as the surface is clean, smooth, and free of any debris or imperfections. However, it’s important to follow the manufacturer’s guidelines and ensure proper adhesion.
5. Are peel-and-stick floor tiles waterproof?
While some of these adhesive tiles are water-resistant, they are not typically recommended for areas prone to standing water, such as showers.
6. Do peel-and-stick tiles require grout?
No, these adhesive tiles do not require grout. However, some people choose to use grout for aesthetic purposes or to enhance durability.
7. How long do peel-and-stick floor tiles last?
The lifespan of peel-and-stick tiles can vary depending on factors such as installation quality, foot traffic, and maintenance. Generally, they can last several years with proper care.
8. Can I install peel-and-stick tiles myself?
Yes, these self-adhesive floorings are designed for easy DIY installation. Follow the manufacturer’s instructions carefully for best results.
9. Can peel-and-stick tiles be removed easily?
Yes, peel-and-stick tiles can usually be removed without causing damage to the underlying surface. Apply heat using a heat gun or hairdryer to soften the adhesive, then carefully peel off the tiles.
10. Do peel-and-stick tiles expand and contract with temperature changes?
Some peel-and-stick tiles are designed to accommodate slight expansion and contraction, but it’s essential to follow the manufacturer’s guidelines for installation and use.
