
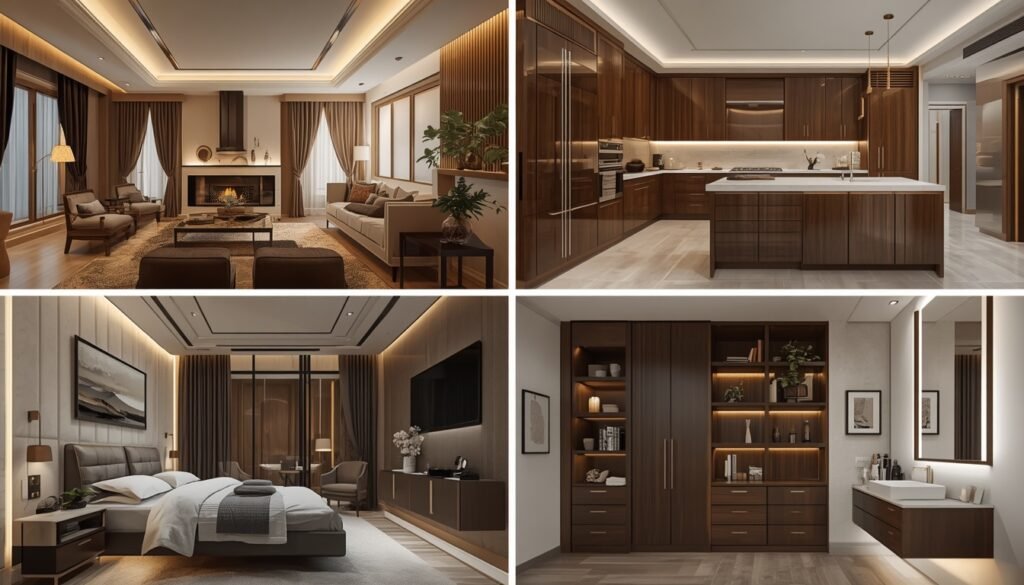
Introduction to Navigate the Challenges of Small Space Design:
Small Space Design is the practice of organizing and decorating smaller rooms or apartments so they feel larger, remain functional, and stay clutter-free without sacrificing comfort or style.
Navigating the challenges of small-space design involves managing limited square footage, lack of storage, and poor lighting by using multifunctional furniture, vertical storage solutions, light color palettes, and strategic mirror placement to make small rooms feel larger, more functional, and clutter-free.
Designing a small space is one of the biggest problems in modern house interiors today. It is very easy to make a big house look beautiful. But making a small, tight house feel open, comfortable, and useful requires a real plan. Every day, I see homeowners facing the same issue: they want enough storage and seating, but they end up making their home look crowded and messy.
This article is simple and direct: I’m sharing 10 practical design solutions from my years of hands-on experience. These actionable ideas will help you navigate the challenges of small space design and turn your compact home into a comfortable, welcoming space.
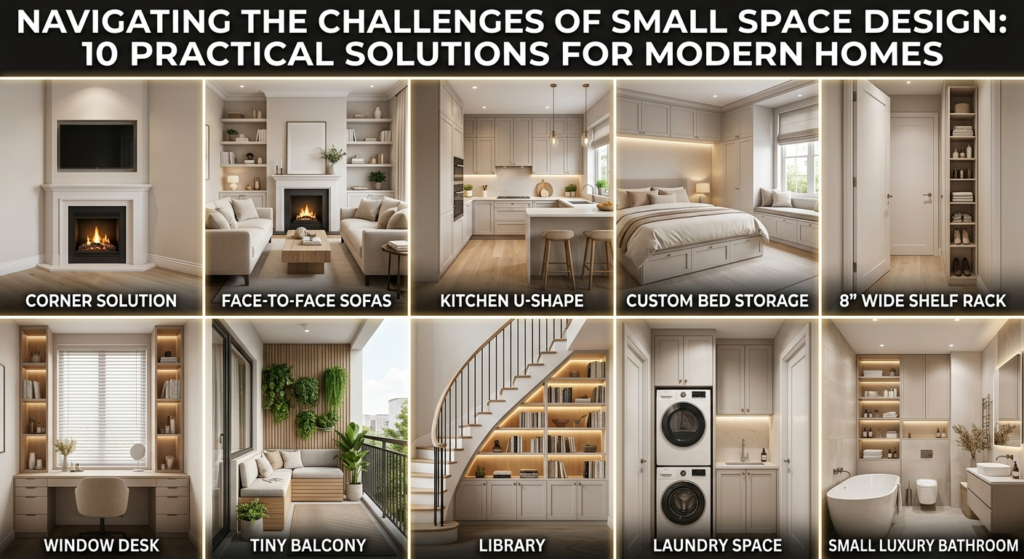
1. Smart Solution For Awkward Living Rooms:
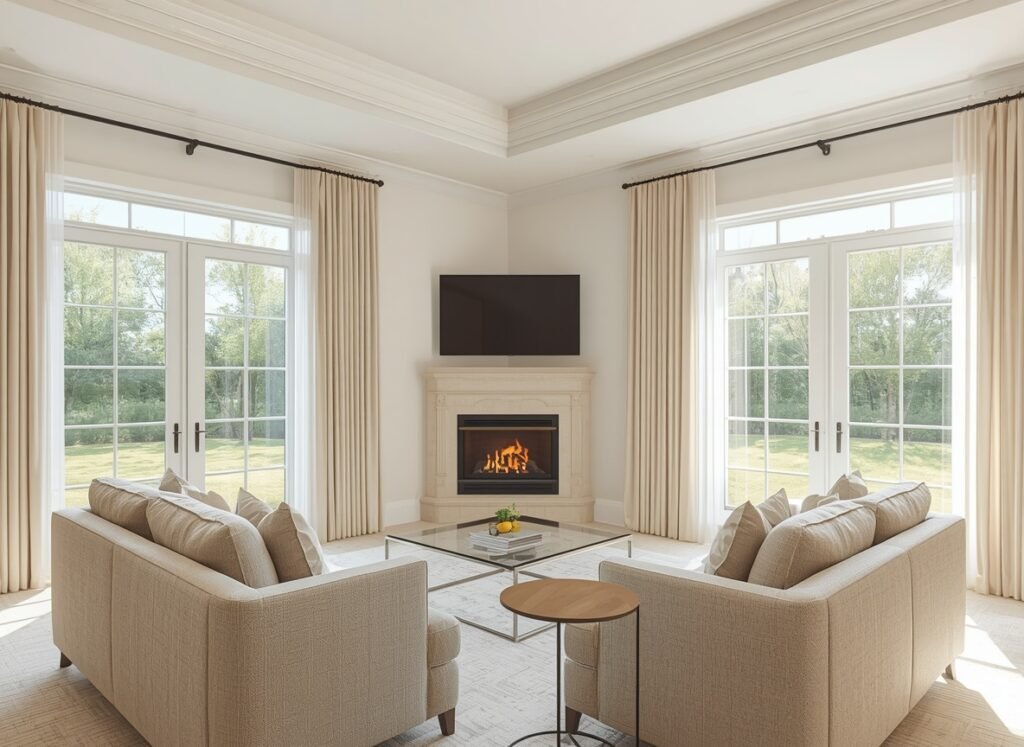
The Problem: Sometimes, a room has a strange shape that makes it hard to plan. In this project, the room had a very difficult corner and two big windows right next to it. Because of these windows, it was very hard to arrange the furniture without blocking the view or the walking paths.
The Solution: As an expert designer, I decided to turn the strange corner into the main highlight of the room (as you can see in the picture above). We fixed a small fireplace inside the corner wall to create a beautiful focus point. Since the wall space above the fireplace was empty, we fixed the LCD TV right above it.
To complete this awkward living room setup, we placed two medium-sized sofas facing the corner. We added a small round table near the sofa arms and put a square glass coffee table in the center. Finally, we painted the walls in a light color and hung light-colored curtains to make the small room look big, open, and beautiful.
Takeaway for Readers: If you are dealing with a difficult room shape, make the corner your main focus point. By installing a corner fireplace and putting your TV above it, you can arrange your sofas easily and turn a strange space into a luxury living room.
2. Smart Seating Ideas For Small Rooms:
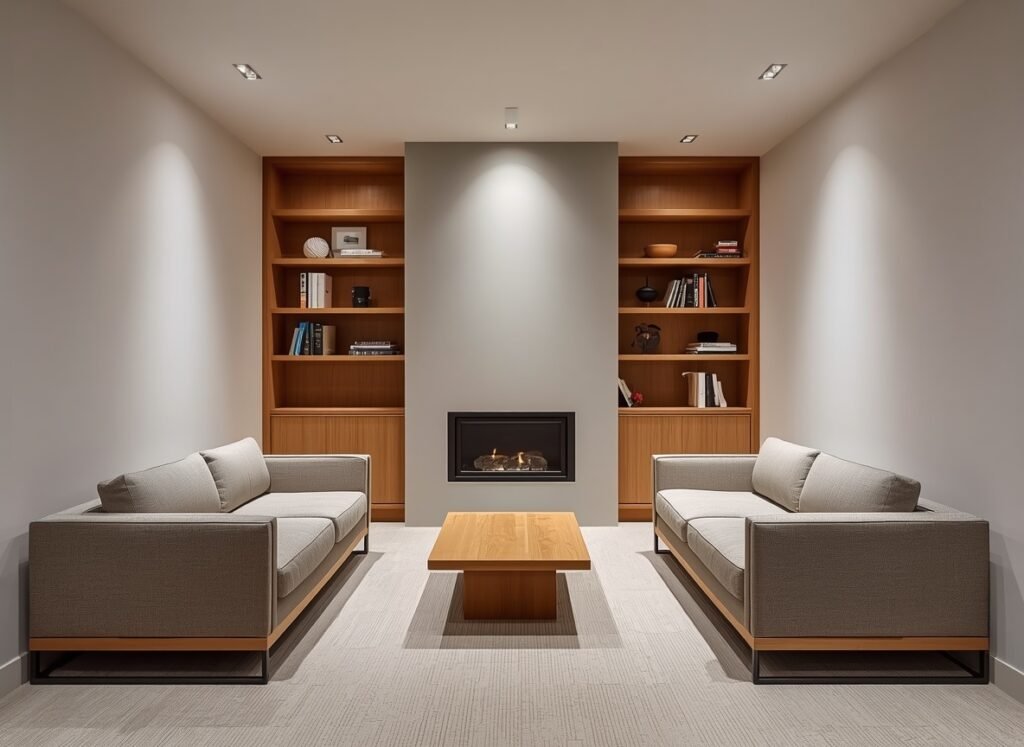
The Problem: Many modern living rooms are small and narrow. If you buy big, heavy sofas, they block the walking space. Also, empty walls are often wasted when they could be used for storage.
The Solution: To solve this, we used a smart plan (as you can see in the picture above). We placed two small, comfortable sofas opposite each other. This keeps the room open. In the middle, we added a small fireplace to make the room look cozy.
The walls on both sides of the fireplace were empty. We used this space by making 3 open shelves on each side for decoration pieces or books. Under these shelves, we made small cabinets. These are perfect to hide away daily living room items when guests arrive. Lastly, we put a simple coffee table in the center to maintain a clean look.
Takeaway for Readers: If your living room is small, do not use big furniture. Put two small sofas face-to-face and build smart shelves on the wall. If you have a narrow room, exploring narrow awkward room arrangement concepts will also save floor space, give you extra storage, and look beautiful.
3. How To Make Small Kitchens More Functional:
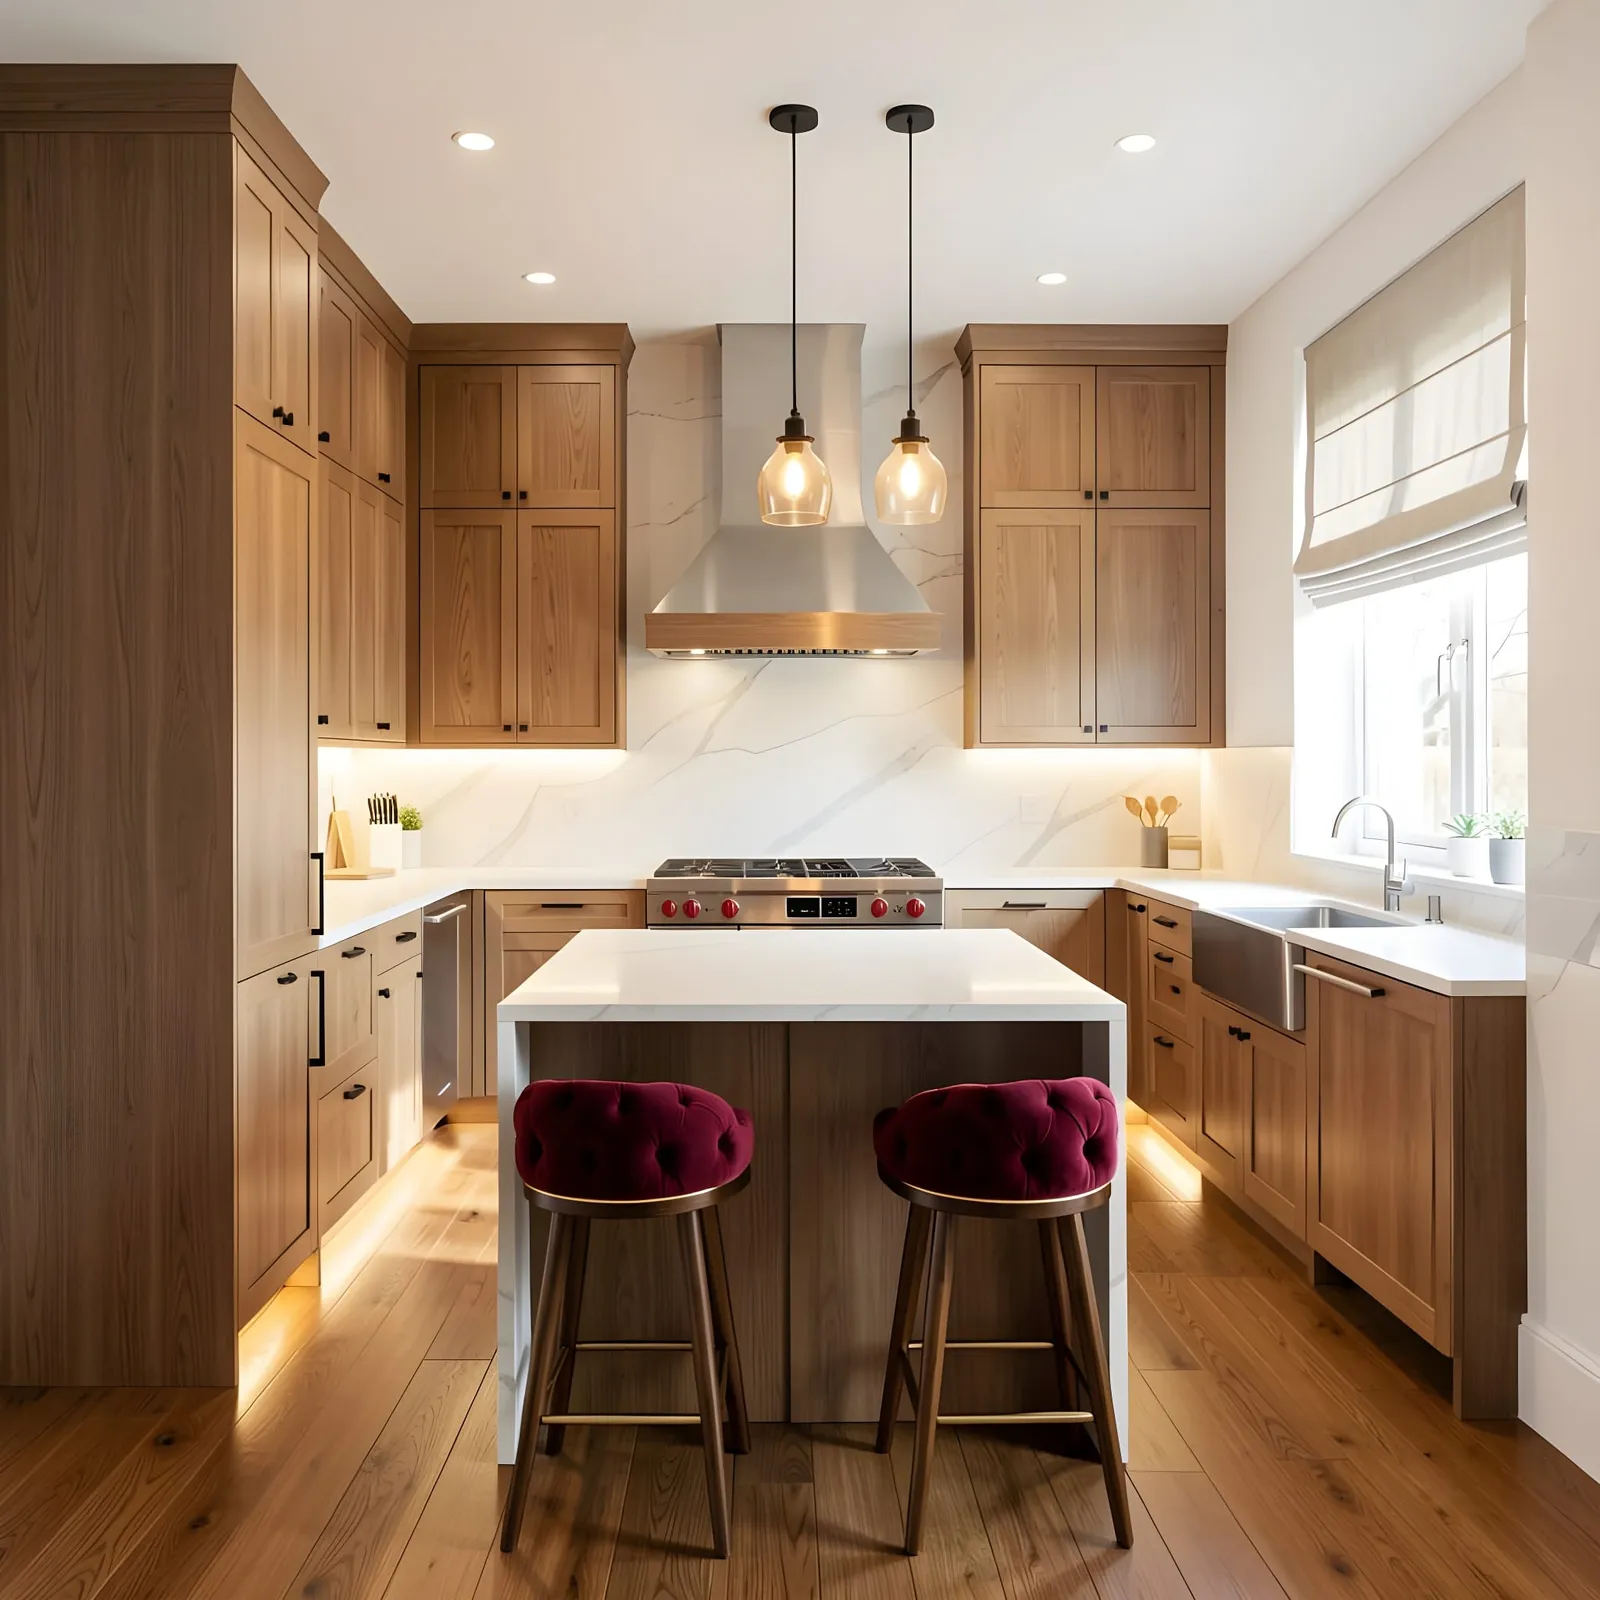
The Problem: The kitchen was very small. There was no space to chop vegetables or cook easily. There was also no place to sit and eat, and very little space to store food boxes.
The Solution: We made a smart plan to create a beautiful kitchen design (as you can see in the picture). First, we made tall wood cabinets that go up to the ceiling. This gives a lot of room to hide all kitchen items using smart space-saving cabinet organization.
Next, we used a U-shaped kitchen layout with a chimney stove and put the sink under the window. We also added a small center counter with two red stools. Now, the owner can use this counter to cut vegetables and sit there to eat breakfast. For the top, we chose a durable dolomite white stone surface. With the under-cabinet lights and hanging lamps, it looks great with the dark wood and makes the small space work perfectly.
Takeaway for Readers: If you have a small kitchen, build tall cabinets to save floor space and achieve a beautiful kitchen design. Add a small center counter to both cook and eat. If you want to revamp your cooking space, check out affordable kitchen styling ideas to always mix dark wood with light tops and good lights to keep the kitchen useful and beautiful.
4. Maximizing Storage in a Small Bedroom:
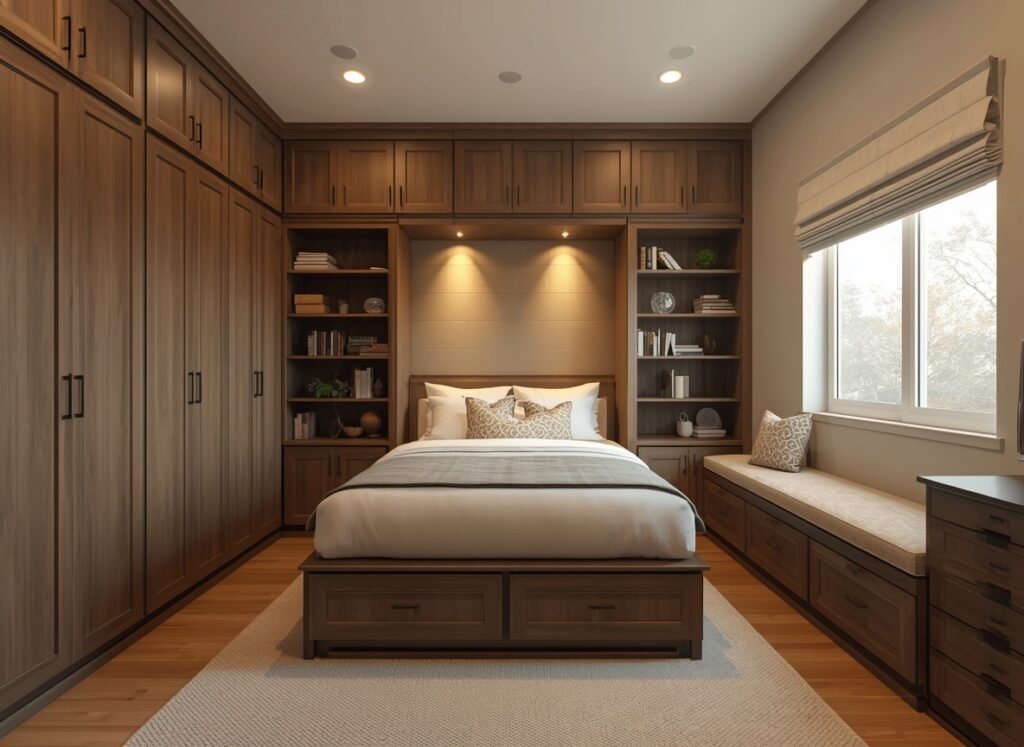
The Problem: The bedroom was very small, but the residents had a lot of things to store. It was very difficult to arrange everything in a clear way without making the room look messy and crowded.
The Solution: To solve this big storage problem, we used every inch of the wall space wisely (as you can see in the picture below). First, we placed a medium-sized bed right in the center. We added built-in drawers under the bed to store daily items easily.
Instead of simple side tables, we made drawers on the left and right sides of the bed, and built tall cabinets above them all the way to the top. We also left a 5-foot space above the bed’s headboard and built large cabinets up to the ceiling. On one side, we added open shelves for books and decoration pieces to make it look beautiful.
Under the window, we made a long cabinet with a cushion on top for a cozy reading spot, and put extra storage drawers underneath it. Finally, we added a small dressing table on the right side for morning prep. To keep the space feeling bright and calm, we paired neutral cream shade combinations on the walls and cabinets.
Takeaway for Readers: If your bedroom is small but you have too much stuff, think vertically. For additional inspiration, explore compact master bedroom layouts or budget-friendly bedroom designs. Using the walls around and above your bed for built-in cabinets, along with drawers under your bed and a window seat, will give you massive storage without losing floor space.
5. Using Narrow Wall Space Behind Doors:
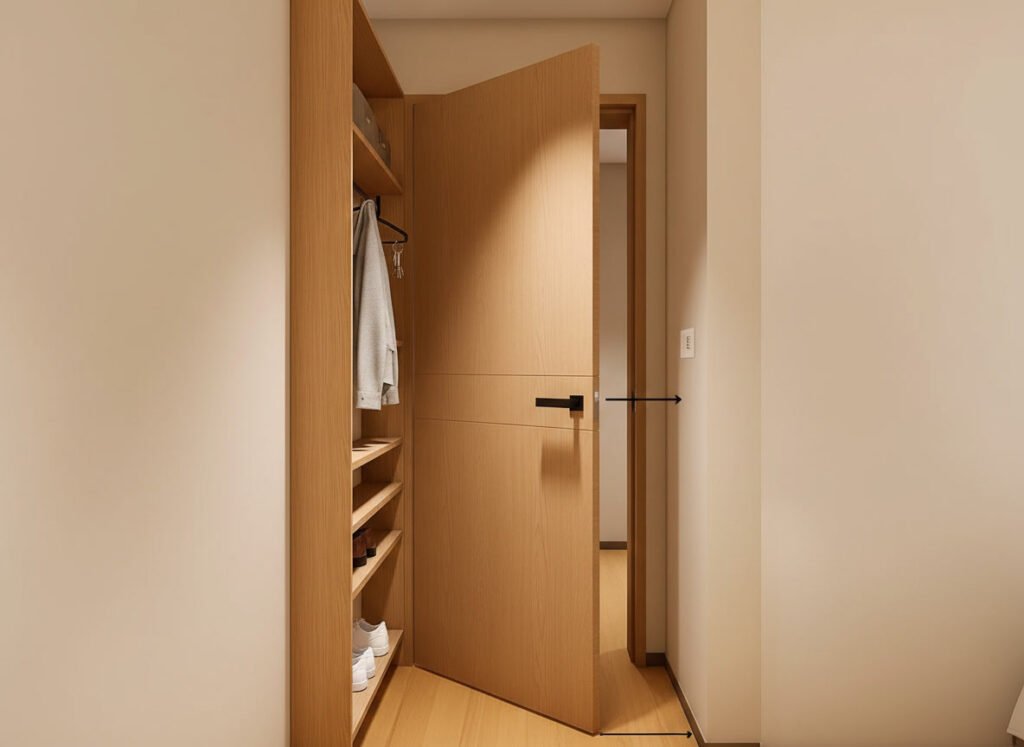
The Problem: In small rooms, the entrance or entryway often feels cluttered. There is usually no space to keep daily items like shoes, coats, ties, and keys when you walk in. Most people think this small corner is completely useless.
The Solution: We found a very smart solution for this tight spot (as you can see in the picture below). There was only a 9-inch gap between the door and the wall. We used this small gap and built a wall-mounted shelf rack from the floor all the way up to the door height.
The rack is only 8 inches wide, and we kept a required distance between each shelf. We used the bottom shelf as a shoe rack, and we also added a coat hanger on the middle. Now, all daily routine items fit perfectly in one place without blocking the door or the room.
Takeaway for Readers: Do not waste the narrow space behind your doors. Even a small 9-inch gap is enough to build a tall, slim shelf rack. This keeps your entryway organized, saves floor space, and looks very neat.
6. Turn Empty Windows Into Work Areas:
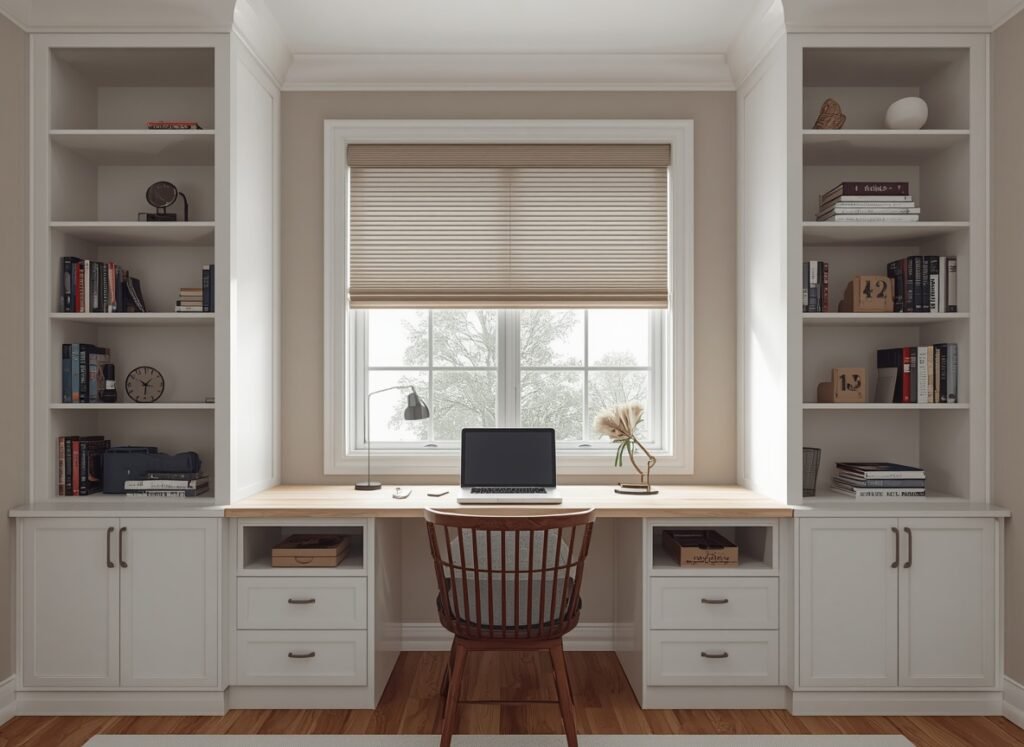
The Problem: In small bedrooms, the space around the window is usually empty and wasted. Also, small rooms do not have enough floor space to put a separate study desk and a makeup dressing table.
The Solution: We solved this problem with a smart idea (as you can see in the picture below). We used the empty window area perfectly. We built an 18-inch-wide wooden top at the window level. You can use this top as a desk to work on your laptop, or as a dressing table for makeup.
Under this wooden top, we made shelves for extra storage. We also built vertical shelves on the left and right sides of the window. These shelves are great for books and decoration items. Lastly, we put simple blinds on the window to block out the sun when needed.
Takeaway for Readers: Do not waste the space around your windows. By building a simple 18-inch top and adding wall shelves, you get a study desk, a makeup table, and storage in one small spot.
7. Turn Tiny Balconies Into Cozy Spots:
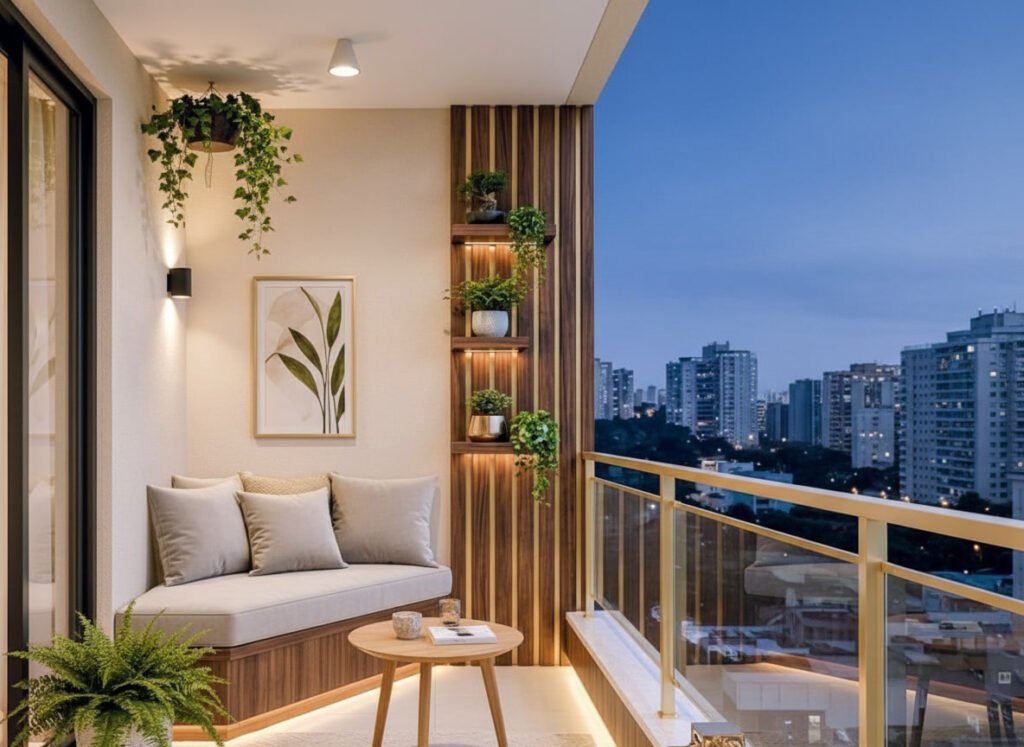
The Problem: Many people have a very small balcony next to their room. Most of the time, they think it is too small to use, so they waste this space or use it just for junk.
The Solution: We solved this by making the empty balcony useful and beautiful (as you can see in the picture below). In the corner, we fixed a custom seating bench. Two people can easily sit here together, or one person can sit comfortably to read a book.
Next to the seating, we added a vertical wooden panel on the wall. We put small shelves on this panel to hold beautiful little plants. Finally, we placed a small rug on the floor and added a soft cushion puff for extra seating on the ground. This simple plan changed a wasted balcony into a fully functional and beautiful space.
Takeaway for Readers: Do not waste your small balcony. By fixing a small bench in the corner and using the wall vertically for plants, you can create a perfect outdoor sitting spot even in a tiny space.
8. Turn Empty Under Stairs Into Libraries:
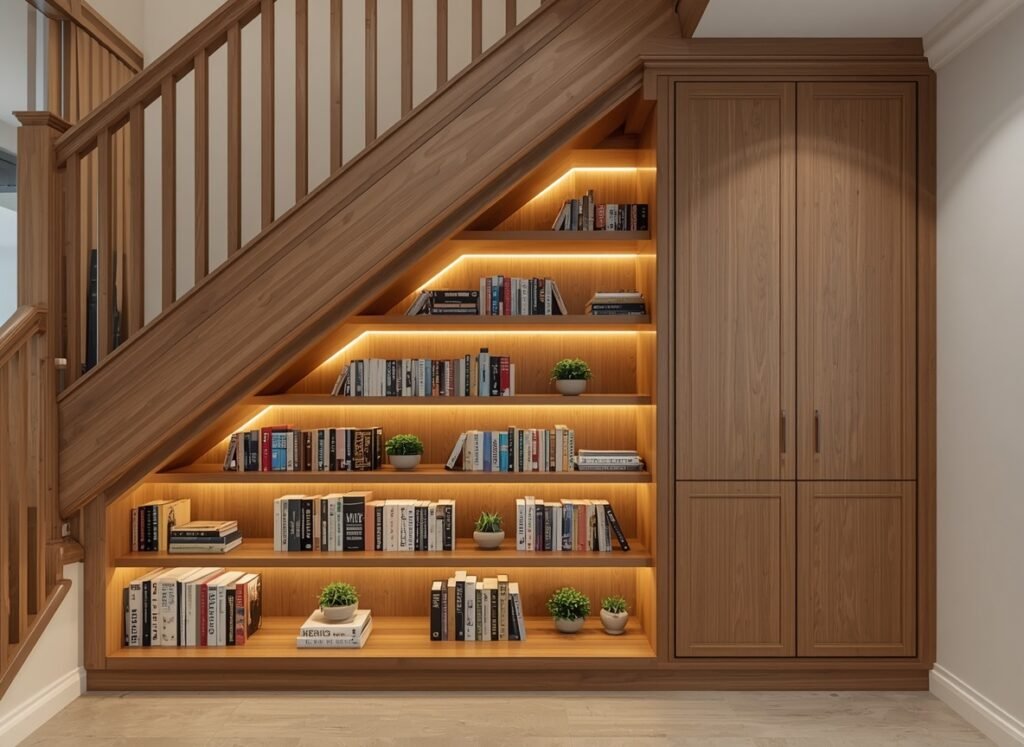
The Problem: The space under the stairs is usually empty in most homes. It just collects dust and looks ugly. Because the shape is triangular, people do not know how to use it, so this good space is wasted.
The Solution: We solved this by turning the empty area into a beautiful library (as you can see in the picture below). We built a custom wooden bookshelf that fits perfectly under the slope of the stairs.
We made many open shelves to store a lot of books and small decorative plants. On the tall side, we added a cabinet with a door to hide away bigger items. Lastly, we put warm LED lights under each shelf. This lighting makes it easy to read book titles and makes the dark corner look bright and beautiful.
Takeaway for Readers: Do not waste the space under your stairs. By building simple shelves and adding lights, you can get a big home library and extra storage without losing any extra room in your house.
9. Making a Small Laundry Space Functional:
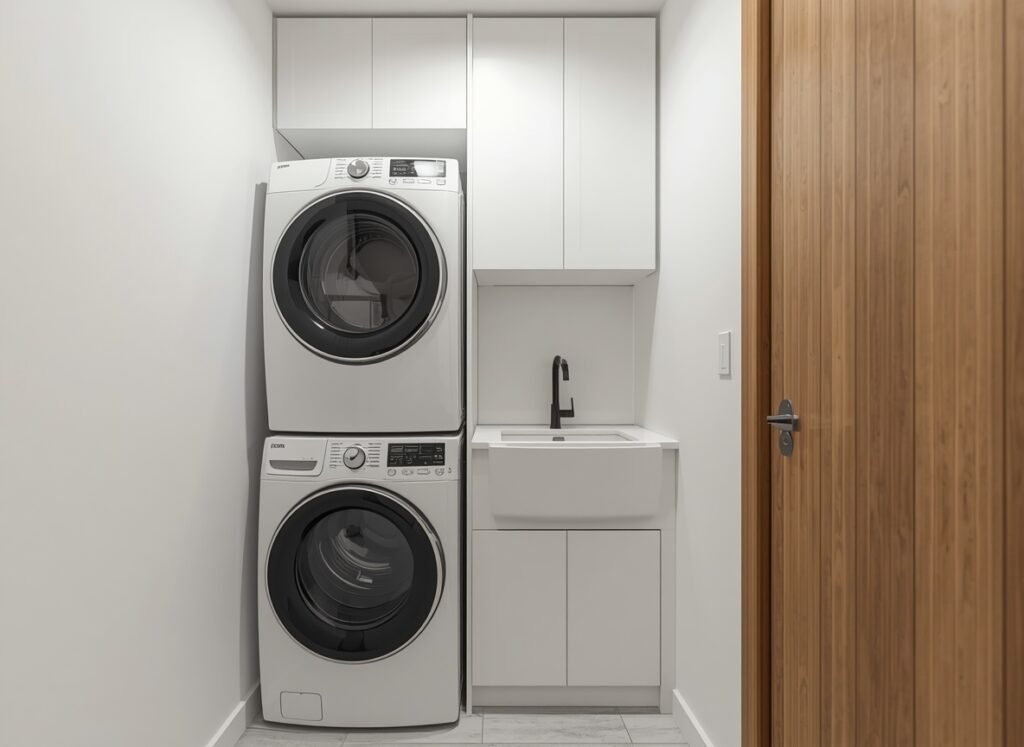
The Problem: The space for washing clothes was very small and narrow. There was not enough floor space to put both a washing machine and clothes dryer. There was also no place to store washing powders or wash small clothes by hand.
The Solution: We used a smart vertical plan to save space (as you can see in the picture below). Instead of putting the washing machine and the dryer side by side on the floor, we put the dryer directly on top of the washing machine. This saved half of the floor space.
Next to the machines, we added a small sink with a tap to wash clothes easily. Under this sink, we made a small cupboard. We also built tall white cabinets above the machines that touch the ceiling. This gives a lot of hidden room to store all cleaning powders and towels out of sight.
Takeaway for Readers: If your laundry area is tiny, stack your dryer on top of your washing machine. Build tall cabinets up to the ceiling for storage, and add a small sink next to them. This keeps the room tidy and useful.
10. How To Make Small Bathrooms Luxury:
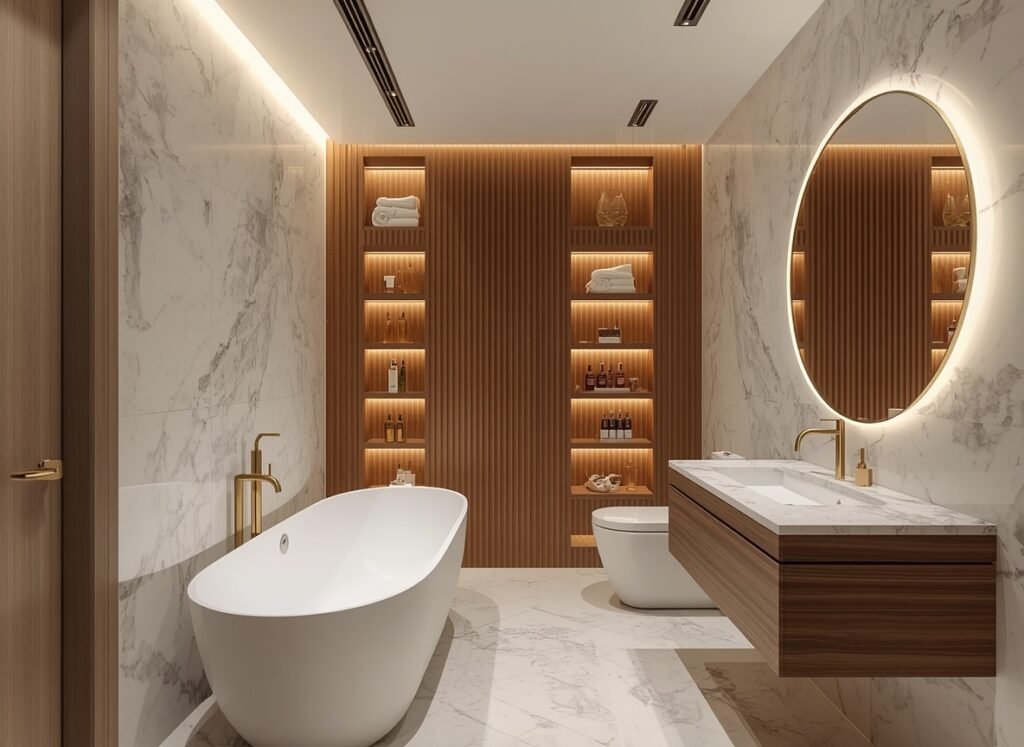
The Problem: The bathroom was small to medium. This caused two big problems. First, there was no space to store daily items like towels and shampoos. Second, the client really wanted a bathtub, but standard tubs are too big for a small bathroom.
The Solution: We made a smart plan to solve both problems (as you can see in the picture below). First, we put the exhaust fan on the ceiling instead of the wall. This saved a lot of wall space. Then, we used the whole back wall to build tall wooden shelves and cabinets. This gave the client plenty of room to store daily items. Next, we put a standalone bathtub right in front of the small vanity. Finally, we put the sink vanity right at the entrance door and placed the toilet next to it for a complete upscale compact washroom style.
Takeaway for Readers: You can make a small bathroom look like a luxury hotel. Just move your exhaust fan to the ceiling, build tall shelves on the main wall for storage, and buy a medium-sized bathtub to save floor space.
Final Thoughts: Designing Small Spaces the Right Way
Living in a house with small or awkward spaces is not a big problem. The real problem starts when we do not plan or design these spaces properly. As an interior designer, my goal is to help you all that how to navigate the challenges of small space design by sharing my practical experience, so you can make your home both beautiful and highly useful.
In this article, I specifically chose the most common difficult areas that almost everyone faces in their daily life. I made this guide using a simple “Problem and Solution” method, so it is super easy for you to understand. I also shared real pictures from my projects to show you exactly how good planning and smart strategies can change any wasted corner into a fully functional space.
Remember, when it comes to decorating your small space, you do not need a huge house to live comfortably. All you need is the right strategy, proper space planning, and a little bit of creativity.

Muhammad Imran is a professional content writer and home interior designer with over 10 years of high experience. He holds a Master’s Degree and has deep expertise in home improvement, home decor, kitchen design, and bathroom remodeling. Through Master Home Decor, he works as a content writer to share his real-world experience and simple, high-quality ideas to help readers create their dream homes.